A wall-mounted blackboard brings a unique blend of practicality and charm into a home. It serves as a dynamic center for family communication, a creative outlet for children, a productive tool for home offices, and a distinctive decorative element. In Singaporean HDB flats, where space is at a premium and walls are precious real estate, installing a blackboard requires thoughtful planning. This comprehensive guide will navigate you through every consideration, from selecting the ideal board and the perfect location to understanding the intricacies of a secure installation that respects your home’s structure.
The Purpose and Versatility of a Wall Mounted Blackboard
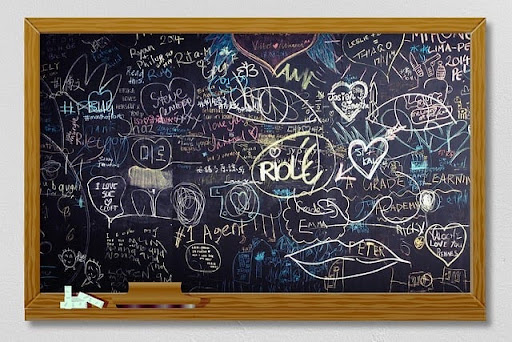
Far from being a relic of the classroom, the modern wall-mounted blackboard has found a vibrant new life in contemporary homes. Its primary function is to organize and communicate. It becomes the family’s central hub for leaving messages, tracking weekly schedules, managing grocery lists, and remembering important dates, effectively reducing paper clutter and digital screen time. For children, it transforms a section of a wall into an endless canvas for imagination, encouraging drawing and learning in a dedicated space that contains the chalk dust mess. In a home office, it functions as an ideal brainstorming tool for visualizing ideas and projects. Aesthetically, a blackboard introduces texture and a touch of rustic warmth to a modern interior, often becoming a striking focal point in a living room, kitchen, or hallway.
Selecting the Right Blackboard for Your Space
The choice of blackboard extends beyond simply picking a size. Understanding the different types available ensures you find a product that aligns with your functional needs and design preferences. The most common options are traditional slate boards, melamine or laminate boards, and porcelain enameled steel boards. True slate offers an authentic, durable, and high-quality writing surface but tends to be the heaviest and most expensive option. Melamine boards are lightweight and affordable, making them a popular choice, though they can be prone to ghosting where chalk marks leave faint residues over time.
Porcelain steel boards, often called chalkboard paint on a steel substrate, provide an exceptionally smooth writing experience and are highly resistant to ghosting. Their weight is moderate, but they require very secure mounting. Beyond the surface material, consider the frame. Framed blackboards offer a finished, furniture-like appearance that can complement your existing decor. Frameless boards provide a more modern, integrated look, appearing as a direct extension of the wall itself. The size of the board should be proportionate to the wall space available and its intended use; a large kitchen command center demands more space than a small memo board beside a front door.
Strategic Positioning and Mounting Considerations
Identifying the ideal location for your blackboard is a decision that balances utility, aesthetics, and practicality. The board should be placed where it will be most used and easily accessible to its primary users. In a kitchen, this might be adjacent to the refrigerator or on an empty wall near the cooking area. In a child’s room or play area, it should be mounted at a height appropriate for them to reach comfortably. For a home office, positioning it behind a desk or in a clear sightline encourages its use during work.
Lighting plays a crucial role in the functionality of a blackboard. Ensure the location has good ambient or directed light to prevent glare and shadows, making the chalk writing clearly visible. It is also wise to consider the potential for chalk dust. While low-dust chalks are available, placing the board away from food preparation areas or sensitive electronics is a prudent measure. Most importantly, the chosen wall must be structurally sound. The considerable weight of a large, framed blackboard necessitates mounting directly into wall studs or solid concrete, not just drywall.
Navigating HDB Drilling Regulations and Wall Types
Installing a heavy object like a blackboard in an HDB flat requires a clear understanding of both construction and regulation. The Housing & Development Board provides specific guidelines for renovation works, which include drilling into walls. Familiarizing yourself with these rules is an essential first step to ensure your project is compliant.
The integrity of your installation is entirely dependent on your wall type. Most HDB internal walls are drywall (plasterboard) fixed to a hidden metal or wooden frame. These studs provide the only secure anchor points for heavy loads. External and structural walls are typically solid concrete, which requires different tools and anchors. A critical part of planning is identifying what lies behind your wall surface. Using a stud finder is the only reliable method to locate the wooden or metal studs behind drywall. Attempting to mount a heavy blackboard using only wall plugs in the hollow sections of drywall will almost certainly lead to failure, potentially causing damage to your wall and the board itself.
A Step-by-Step Guide to Installation
A proper installation guarantees safety and longevity. Follow these steps with care for a professional outcome.
| Step | Details |
|---|---|
| Step 1: Gather Your Tools and Materials | You will need the blackboard, a pencil, a measuring tape, a spirit level, a power drill, a drill bit appropriate for your wall type (masonry bit for concrete, wood/metal bit for studs), wall plugs and screws (appropriate for the board’s weight), a stud finder, and potentially a helper for larger boards. |
| Step 2: Locate the Studs and Mark the Position | Use the stud finder to locate and mark the vertical studs in your desired location. Hold the blackboard against the wall and adjust its position so that the mounting points align with the studs. Use the spirit level placed on top of the board to ensure it is perfectly horizontal. Mark the screw hole locations on the wall through the mounting brackets or directly on the wall for frameless boards. |
| Step 3: Pre-Drill the Holes | Select a drill bit slightly smaller than the diameter of your screws or wall plugs. Carefully drill into the marked spots. For wood studs, drill to the length of the screw. For concrete, drill a hole deep enough to accommodate the wall plug. For HDB flats, use a hammer drill and masonry bit for clean penetration. |
| Step 4: Secure the Mounting Hardware | If using wall plugs for concrete, insert them into the holes. Have a helper hold the blackboard level against the wall, aligning the mounting brackets with the holes. Drive the screws through the brackets and into the wall plugs or studs. Tighten the screws firmly until the board is snug against the wall, but avoid overtightening which can damage the board’s frame or the wall. |
| Step 5: Conduct a Final Safety Check | Gently but firmly try to pull the board away from the wall at the bottom and sides. It should not move or feel loose. Ensure it is level. Once confirmed, your blackboard is ready for use. |
Need a secure, damage-free blackboard installation in your HDB flat or classroom? FixFirst’s certified handymen use professional tools and HDB-compliant techniques to ensure your board is stable and level
Why Choose a FixFirst Handyman To Install Your Wall Mounted Blackboard
Mounting a heavy, often fragile item like a large blackboard is a task where professional skill makes all the difference. Choosing FixFirst ensures an outcome that is safe, precise, and hassle-free.
✔️Expert Structural Assessment: Our handymen instantly identify wall types and locate studs with precision, guaranteeing your heavy board is anchored into solid support, not just brittle drywall.
✔️Compliance with HDB Guidelines: We perform all work in strict accordance with HDB drilling regulations, ensuring your installation is not only secure but also fully compliant.
✔️Perfect Alignment and Finish: We guarantee a perfectly level installation with no misplaced drill holes, damaged walls, or unsightly errors. Our work is clean and professional.
✔️Handling of Heavy and Awkward Items: Large blackboards are cumbersome and difficult to hold level while drilling. Our team manages this efficiently, preventing accidental drops or damage to your board and wall.
✔️Right Tools and Hardware for the Job: We arrive equipped with industrial-grade stud finders, powerful drills for concrete, and the correct heavy-duty anchors and screws for your specific wall type and board weight.

Frequently Asked Questions (FAQs) - Wall Mounted Blackboard Singapore
Porcelain enameled steel offers the best writing experience and durability against ghosting. Melamine is a budget-friendly option for lighter use, while true slate provides a classic, high-end look.
Yes, chalkboard paint creates a direct writing surface on your wall. It is a good option for very large or irregularly shaped areas. However, a mounted board offers a more finished look and can be moved or replaced more easily.
Use a proper chalkboard eraser for daily cleaning. For a deeper clean, wipe the surface with a damp cloth and then dry it thoroughly. Avoid using chemical cleaners.
For a family command center, mount it so the center is at eye level for adults (approx. 150-160cm from the floor). In a child’s room, mount it lower so the top third of the board is at their eye level.
Yes, liquid chalk markers provide vibrant, dust-free writing. However, they require a non-porous surface like porcelain steel and can be harder to erase completely, sometimes requiring a damp cloth.
Only if installed incorrectly. Proper installation into studs or concrete with appropriate anchors will not damage the structural integrity of the wall. Removal will leave small screw holes that are easily filled.
This depends entirely on being anchored into a stud. A single stud can typically support significant weight (over 50kg) when the load is distributed correctly across multiple screws. Hollow drywall anchors alone are insufficient.
There is no functional difference; the material is the same. The choice between black and green is purely an aesthetic one.
D-rings require you to drive a screw into the wall, leaving the head protruding. The board then hooks onto these screws. This method still requires the screws to be firmly anchored into wall studs.
Yes, but it requires specific masonry drills and anchors. The uneven surface can also make it trickier to get the board to sit perfectly flat, which a professional can manage effectively.
A wall-mounted blackboard is a wonderfully functional and stylish addition to any Singapore home, fostering organization, creativity, and family connection. The journey to a successful installation hinges on a thoughtful choice of board, a strategic selection of location, and, most critically, a methodical and secure mounting process that respects the construction of your HDB flat. While a DIY approach is tempting, the weight of the board and the need for absolute precision make a strong case for professional expertise. Ensure your new centerpiece is installed with safety and perfection. Contact FixFirst today to schedule your professional blackboard mounting service. Our skilled handymen will transform your vision into a securely anchored reality, ready for years of use and enjoyment.