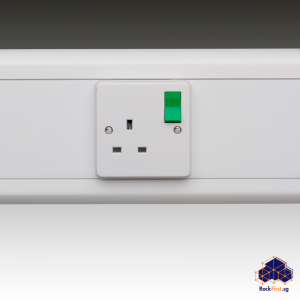
Switch Installation
In HDB flats, a switch installation is classified as a type of electrical work that does not require a permit from the HDB. Compared to storage water heater installation, which is limited by the HDB to 1.5kWh or less in electrical consumption, switch installation–although it is not regulated by the HDB–is similar to a rewiring job or even a ceiling light installation job, which means it is highly recommended that you book an electrician to properly and safely do the installation. An experienced electrician can readily draw from a well of knowledge and skills that may not be available to you; he will also be able to see how things could go wrong during and after the switch installation. But if you feel confident you can pull off the job properly, then here’s how the installation goes for a conventional switch.
Two Basic Types of Switches
There are two basic types of switches. This article will only cover the installation of a one-way switch. A one-way switch is the standard switch used to turn on and off a single light, or sometimes multiple lights that are wired in a series. A two-way switch, on the other hand, allows for two switches on the same circuit. You can turn the same light on and off from two switches installed strategically in two different areas in your home, but the on and off positions of the two switches are dependent on one another–which means you won’t be able to tell the difference between an on and off position in a two-way switch just by looking at the switch itself.
How To Install a Conventional One-Way Switch
The generalized steps to installing a standard switch are as follows:
- Turn off the power supply to the switch you will be working on. If you can’t tell which breaker goes with which circuit in your home, just turn off the whole power distribution box. Human deaths have been caused by electric shock at 42 volts; the electrical pressure in the switch you are attempting to install can be as high as 240 volts.
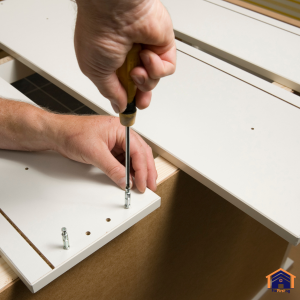
- Use a screwdriver to remove the screws that fasten the faceplate. Pull carefully and avoid tugging the faceplate too hard. Or else, you end up damaging the wires.
- Note the wires and their corresponding terminals. Earth terminal is usually indicated by the green or yellow wire. There’s blue or black wire for the L1 terminal and brown or red for the common terminal. It helps to take a photo of the wires. Use your phone’s camera to do this. The photo you can later use for reference when matching the wires to the switch.
- As much as possible, use an electrically safe screwdriver called a VDE screwdriver to loosen the terminal screws at the back of the faceplate.
- On the new switch you are about to install, note the location of the terminals. Miswiring is potentially dangerous. Focus on the letters and symbols, not the switch position. If the switch has a distinctive top and a distinctive bottom, install it the right way up.
- Now reconnect the brown or red wire to the common terminal, blue or black to the L1 terminal, and green or yellow to the earth terminal. Do not tighten the screw just yet. Push the entire earth cable running from the back box toward the earth terminal, and then tighten it.
- Check each wire by tugging gently to ensure none of them will come out.
- Put the faceplate back and secure with the screws.
- Check by turning the power supply and flicking the switch.
How To Replace a Light Switch Singapore
Replacing a light switch in Singapore requires basic electrical knowledge and adherence to safety standards. First, turn off the circuit breaker to avoid electrocution. Use a voltage tester to confirm the power is off before unscrewing the faceplate. Modern HDB flats often use single-pole switches, which have two terminals—live (brown) and neutral (blue). Disconnect the old switch, noting the wire positions, and connect them to the corresponding terminals on the new switch. Secure the faceplate and restore power to test functionality.
Singapore’s Building and Construction Authority (BCA) recommends hiring a licensed electrician for any electrical work in public housing. DIY replacements may void warranties or violate regulations, so always verify compliance before proceeding.
How To Test a Light Switch
A faulty light switch can cause flickering lights or complete power loss. Start by turning off the power and removing the faceplate. Use a multimeter to check for continuity between terminals when toggling the switch. No reading indicates a broken switch. Alternatively, a non-contact voltage tester can detect live wires if the switch fails to control the light.
In older Singaporean homes, corrosion or loose wiring often causes switch failures. Regular maintenance checks can prevent hazards, especially in humid climates where moisture accelerates wear. If testing confirms a defect, replace the switch immediately or consult a professional.
How To Wire a Light Bulb to a Switch
Wiring a light bulb to a switch involves connecting the live wire from the power source to the switch and then to the bulb. The neutral wire runs directly from the power supply to the bulb, completing the circuit. In Singapore, standard wiring uses brown (live), blue (neutral), and green/yellow (earth) cables. For ceiling fixtures, ensure the switch interrupts the live wire—not the neutral—to prevent shock risks. Modern LED-compatible switches may require a neutral wire at the switch box, unlike traditional setups. Always insulate connections with terminal blocks and avoid exposed wiring.
How To Wire a Dimmer Switch to a Ceiling Light
Dimmer switches enhance ambiance but require compatible bulbs (e.g., LED or halogen). Turn off the power and remove the existing switch. Most dimmers have two live wires. Connect one to the power source and the other to the light fixture. Neutral wires (if present) must be joined with a connector, not the dimmer. Singaporean homes often use trailing-edge dimmers for LEDs, which reduce buzzing and flickering. Make sure that the dimmer’s wattage rating matches the total load of connected lights. Incorrect installation can shorten bulb lifespan or cause overheating, so consult the manufacturer’s guidelines or an electrician for complex setups.
How To Trace Light Switch Wiring
Tracing wiring behind walls ensures safe modifications. Start by turning off the power and removing the switch plate. Use a tone generator or circuit tracer to follow wires through conduits. In older Singaporean flats, wires may run unpredictably due to renovations, so label each cable before disconnecting. For non-invasive detection, infrared thermal scanners can identify live wires behind plaster. Always document the circuit layout for future reference, especially in landed properties where wiring may span multiple floors.
How To Wire a Double Light Switch
Double switches control two lights independently. Each switch has separate live and neutral terminals. Connect the main live wire to the common terminal (usually marked “COM”) and link the individual light wires to L1 and L2. In Singapore, double switches are common in living rooms and master bedrooms for layered lighting.
Make sure that the switch box has enough depth for the larger mechanism. Overcrowding wires can cause overheating, so use compact connectors and secure cables neatly. Test each switch separately to confirm correct wiring before reassembling.
How To Wire a 3-Way Light Switch
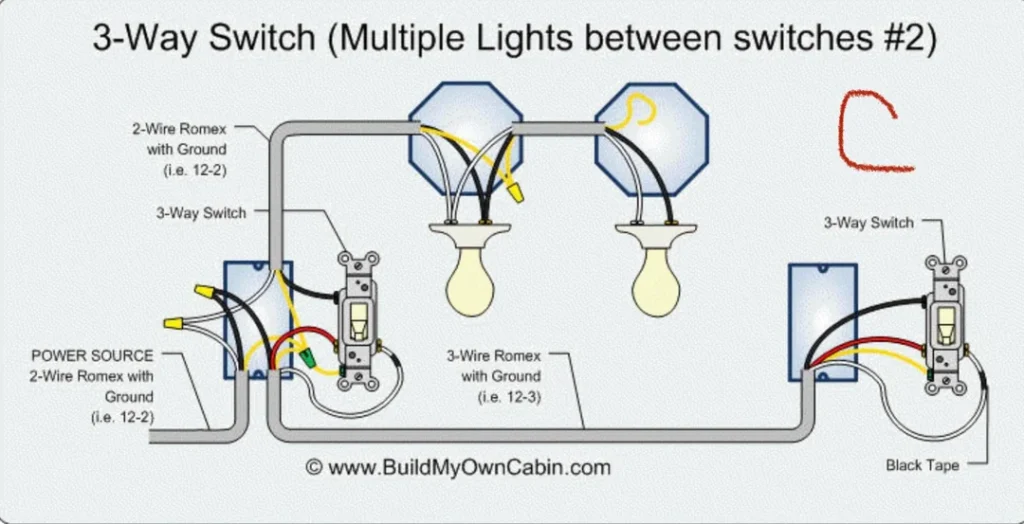
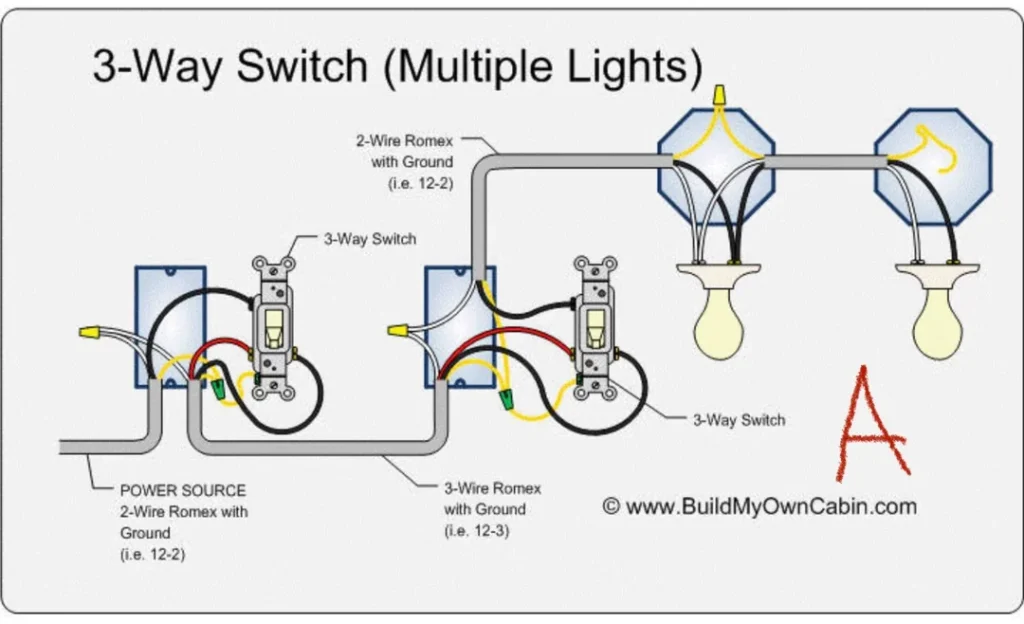
Three-way switches allow light control from two locations (e.g., staircases). They require an additional traveler wire (usually black or grey) between switches. The live wire connects to the common terminal, while the traveler wires link the switches. The light fixture ties into the second switch’s common terminal. In Singapore’s landed properties, three-way setups improve convenience but demand precise wiring. Misconnected traveler wires can cause switches to malfunction. Use a voltage tester to verify correct connections, and consider color-coding wires to avoid confusion during installation.

Why Choose a Professional for Your Switch Installation
Attempting a DIY switch installation may seem like a cost-saving measure, but the risks far outweigh any perceived benefits. Electrical systems demand precision, and even a minor mistake can lead to catastrophic consequences, including electrical fires, short circuits, or severe personal injury. Licensed electricians possess the technical expertise to handle wiring safely. Without proper training, homeowners risk voiding their home insurance policies, as most providers reject claims stemming from unlicensed electrical work.
Beyond safety, professional electricians guarantee long-term reliability. A poorly installed switch may function initially but can degrade over time, causing flickering lights, overheating, or complete electrical failure. Professionals use high-quality materials and industry-grade tools, minimizing future repair costs. They also assess your home’s broader electrical load, preventing circuit overloads—a common DIY oversight that damages appliances and wiring.
Time efficiency is another critical factor. What might take an amateur hours (or days) of trial and error, a professional completes swiftly with flawless execution. Moreover, certified electricians offer warranties on their work, providing peace of mind that DIY methods simply cannot match. When it comes to electrical safety and performance, cutting corners is never worth the risk.
Frequently Asked Questions (FAQs) – Switch Installation
We install a wide range of switches, including light switches (single-pole, double-pole, three-way, and dimmer switches), power outlet switches, smart switches (compatible with home automation systems), USB charging outlet switches, isolator switches, and circuit breaker switches. If you’re unsure about the type of switch you need, our technicians can assess your requirements and recommend the best option.
You have the option to either purchase the switches yourself or let us handle it for you. If you prefer us to supply the switches, we can provide high-quality, certified switches at competitive prices. Our team will ensure the switches meet safety standards and are compatible with your electrical system.
The installation time depends on the complexity of the job. For a standard switch installation, it typically takes 30 minutes to 1 hour. However, if additional wiring or electrical work is required, it may take longer. Our technicians will provide a time estimate after assessing your specific needs.
Yes, switch installation is safe when performed by licensed and experienced professionals. At FixFirst, our electricians are fully trained, certified, and adhere to strict safety standards. We ensure all installations are compliant with Singapore’s electrical codes and regulations.
Absolutely! We specialize in replacing old, damaged, or faulty switches. If you’re experiencing issues like flickering lights, sparking, or switches that don’t work, our team can diagnose the problem and replace the switch safely and efficiently.
Yes, we provide installation services for smart switches, which allow you to control your lights and appliances remotely via a smartphone app or voice assistants like Alexa or Google Home. Our technicians will ensure proper setup and integration with your home automation system.
No, a properly functioning light switch cannot flip on by itself. If this happens, it may indicate a faulty switch, wiring issues, or electrical surges. Contact a licensed electrician immediately to inspect and resolve the problem.
Yes, a KDK fan light can be controlled via a wall switch if wired correctly. Some models may require a compatible switch or remote control integration.
Yes, timer switches (mechanical or digital) can automate lighting. They replace standard switches and require proper voltage compatibility.
Yes, LED lights require an LED-compatible dimmer switch. Standard dimmers may cause flickering or damage. Check the dimmer’s specifications before installation.
Yes, only use dimmable LED or incandescent bulbs with dimmer switches. Non-dimmable bulbs will malfunction or fail prematurely.
No, frequently switching lights on and off does not waste electricity. However, some bulbs (like CFLs) may have a shorter lifespan if switched excessively. LED bulbs are unaffected and highly energy-efficient.
Turn off the power at the circuit breaker. Remove the old switch and disconnect wires. Then connect the new switch (live, neutral, and ground wires). Note that the switch setup in Singapore has no neutral point. Finally, secure the switch in the wall box and restore power. For safety, hire a professional electrician if unsure.
A 2-way (or 3-way) switch allows control of a single light from two locations. It uses three wires (live, traveler, and switched live) to toggle the circuit.
Reverse polarity switches break the neutral wire instead of the live wire. While functional, this setup is unsafe and violates electrical codes. Always wire switches to interrupt the live wire.
LED switches function like standard switches but may include features like dimming or smart controls. Ensure compatibility with low-voltage LED lighting.
Light switches typically last 15 to 20 years with normal use. Signs of wear include flickering lights, sparking, or difficulty turning the switch on/off. If you notice these issues, consider replacing the switch.
Adding a new switch requires running a cable from an existing power source (outlet or junction box) to the new switch location. A licensed electrician can ensure proper wiring and compliance with safety standards.
Turn off the power supply and remove the outlet cover. Run a new cable from the outlet to the switch location. Then connect the hot wire to the switch and the load wire to the light. Secure connections and test the circuit.
Turn off power and remove the existing fixture. Then install a pull cord switch in line with the live wire. Finally, reattach the light fixture and test functionality.
An electrician can tap into the switch’s wiring to add an outlet. This requires ensuring the circuit can handle the additional load and proper grounding. It’s best not to DIY this.
In Singapore, blue wiring typically indicates the neutral wire. However, always verify with a voltage tester, as incorrect wiring can be dangerous.
This happens due to residual current from a poorly wired switch (reverse polarity), capacitive coupling in long wires, or a non-compatible dimmer switch. An electrician can properly diagnose and fix the issue.
Popular retailers include Hafele Singapore (for smart & designer switches), Legrand and Schneider Electric outlets (for modern designs), and local hardware stores (Sim Siang Choon, Seng Bee).
Turn off the breaker and remove the switch cover. Touch one probe to the live terminal and the other to ground.If the tester lights up, the circuit is live. Always double-check before handling wires.
Open the switch box. A neutral wire is usually blue in Singapore. Smart switches often require a neutral; if absent, consult an electrician for alternatives.
If your switch is sparking, overheating, or emitting a burning smell, turn off the power immediately at the main circuit breaker and contact us right away. These are signs of a serious electrical issue that requires urgent attention from a professional electrician.
While simple switch replacements may seem straightforward, electrical work can be dangerous if not done correctly. Improper installation can lead to electrical fires, short circuits, or damage to your appliances. For your safety and peace of mind, we recommend hiring a licensed electrician for all switch installations.
The cost of switch installation depends on factors such as the type of switch being installed, complexity of the job, and whether additional wiring or electrical work is required. We offer transparent pricing with no hidden fees. Contact us for a free, no-obligation quote tailored to your specific needs.
Yes, we provide switch installation services for both residential and commercial properties. Whether you need switches installed in your home, office, or retail space, our team has the expertise to handle the job efficiently.
We serve customers across Singapore, including both central and suburban areas. If you’re unsure whether we cover your location, feel free to contact us, and we’ll be happy to assist.
Scheduling a service is easy! You can call or Whatsapp us at 89107700 or email us at admin@fixfirst.sg. Our team will get back to you promptly to confirm your appointment.
Yes, we understand that electrical issues can arise unexpectedly. If you have an urgent switch installation or repair need, contact us, and we’ll do our best to provide same-day or next-day service.
Absolutely! Our team can guide you in selecting the right switch based on your preferences, budget, and electrical requirements. Whether you need a basic switch or a smart switch with advanced features, we’re here to help.
To ensure the longevity of your switches, avoid overloading the circuit. Then check regularly for signs of wear, such as cracks or loose fittings. Keep the switches clean and free from dust. And, if you notice any issues, contact us immediately for a professional inspection.
If you have any other questions or need further assistance, don’t hesitate to reach out to us. At FixFirst, we’re committed to providing top-quality switch installation services that meet your needs and exceed your expectations.