Transforming the walls of a Singapore home into a personal gallery represents a powerful form of self-expression. In the context of HDB flats and condominiums, where space is a premium commodity, vertical real estate becomes the perfect canvas for memories, art, and personality. However, the journey from a bare wall to a stunning display involves careful consideration, from selecting the right type of wall mounted picture frames to understanding the nuances of secure installation on our unique building surfaces. This comprehensive guide navigates every aspect of incorporating these decorative elements into your living space, ensuring a result that is both beautiful and built to last.
The Purpose and Appeal of Wall Art in Singaporean Interiors
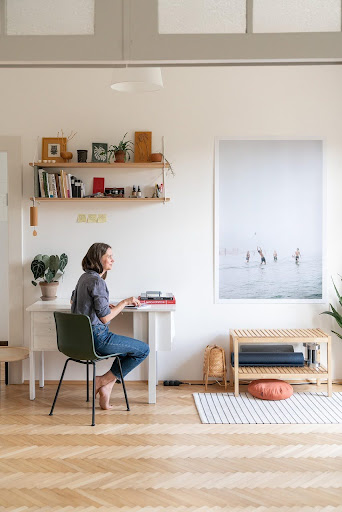
In a densely populated urban environment like Singapore, homes serve as intimate sanctuaries. Wall art transcends mere decoration; it personalizes compact spaces, tells a family’s story, and dramatically alters the perception of a room’s dimensions. A thoughtfully arranged wall mounted display frame collection can become a focal point, drawing the eye and creating a sense of depth. For many, it is the final, crucial layer that makes a house feel truly like a home, reflecting individual tastes and cherished moments without consuming valuable floor space.
Navigating the Selection: Choosing the Right Frames for Your Space
Selecting the perfect frame involves more than matching a colour to your sofa. It requires a holistic view of your environment. Consider the existing decor style. Is it minimalist, industrial, Scandinavian, or classic? The frame should complement, not compete with, the artwork it holds. The size and proportion of the wall itself are critical; a large, empty wall demands a substantial piece or a curated gallery arrangement, whereas a narrow hallway might benefit from a series of smaller wall mounted photo frames.
Material choice plays a dual role in aesthetics and practicality. The classic appeal of a wall mounted glass frame offers clarity and a traditional feel but carries weight and potential safety concerns. In contrast, an acrylic picture frames wall mount option provides a modern, lightweight alternative with superior shatter-resistance, a significant advantage in a household with young children or in high-traffic areas. The colour and thickness of the frame moulding will also influence the overall impact, with thinner, neutral tones offering a contemporary look and wider, ornate frames making a more dramatic, traditional statement.
A Deep Dive into Frame Types and Their Ideal Use Cases
Understanding the different types of frames available empowers you to make an informed decision tailored to your specific needs. Each type serves a distinct purpose and suits certain styles of artwork and interior design themes.
The standard wall mount frame is the most ubiquitous choice, typically featuring a solid backing and a glass or acrylic front, held together with flexible metal tabs. These versatile frames work well for formal family portraits, purchased art prints, and certificates. They offer a finished, protective enclosure for valuable paper-based items.
For a sleek, modern aesthetic that emphasizes the art itself, acrylic poster frames wall mount systems are unparalleled. These often consist of two sheets of polished acrylic that clamp the poster between them, creating a floating effect. This style is ideal for modern graphic prints, movie posters, and any artwork where a minimalist presentation is desired. The clarity of a high-quality acrylic frame wall mount setup adds a touch of gallery-like sophistication.
A wall mounted acrylic photo frames variation is the box frame or shadow box. These deeper frames allow for the display of three-dimensional objects alongside photographs or alone. They are perfect for preserving and presenting memorabilia such as seashells from a favourite beach, a child’s first shoes, or a collection of vintage badges, adding texture and depth to your wall arrangements.
The hardware is just as important as the frame itself. The type of picture frame wall mounting brackets determines both the security of the installation and the final positioning. Keyhole hangers, sawtooth hangers, D-rings, and wire systems each offer different levels of stability and adjustability. For heavier frames, such as a large wall mounted glass frame, D-rings with screws anchored directly into wall plugs are non-negotiable for safety and security.
| Frame Type | Key Characteristics | Best Use Cases | Considerations for Singapore Homes |
|---|---|---|---|
| Standard Glass Frame | Traditional look, excellent clarity, heavier. | Formal portraits, valuable art, certificates. | Weight requires secure mounting; risk of shattering. |
| Acrylic Poster Frame | Modern, lightweight, shatter-resistant, “floating” look. | Modern art, posters, prints, minimalist interiors. | Can scratch more easily; perfect for HDB walls due to low weight. |
| Shadow Box/Display Frame | Deep profile with depth to hold 3D objects. | Memorabilia, medals, souvenirs, textured art. | Can be heavy; requires deep, strong wall anchors (e.g., sleeve anchors) into concrete. |
| Clip Frame | Simple design; clips hold glass/acrylic over art. | Temporary displays, frequent art changes. | Offers less protection; can look less finished. Ideal for renters or rotating decor. |
| Canvas Float Frame | Wooden frame that wraps around the canvas edge. | Gallery-style canvas prints, modern art. | Protects canvas edges; adds a finished profile. Ensure secure bracket mounting for long-term display. |
Mastering the Art of Positioning and Arrangement
Before a single hole is drilled, the arrangement of your wall mount poster frames must be planned. The golden rule of hanging art is to position the center of the picture or grouping at approximately 145-150cm from the floor, which aligns with the average eye level. In rooms where people are primarily seated, such as a dining area or home office, you may hang pieces slightly lower.
For gallery walls, meticulous planning is essential. Lay out all the frames on a large clean floor area first. Play with the arrangement until you find a composition that is balanced and pleasing. Take a photo of the final layout for reference. Alternatively, create paper templates of each frame, tape them to the wall, and live with the arrangement for a day to ensure it feels right. This step prevents unnecessary drilling and patching of holes, a particularly valuable practice when dealing with HDB walls.
The Step-by-Step Guide to Secure Mounting
Installing your wall mounted photo frames correctly ensures they remain straight, secure, and damage-free. Following a methodical process yields professional results.
| Step | Details |
|---|---|
| Step 1: Gather Your Tools | You will need a measuring tape, a pencil, a spirit level, quality wall plugs and screws appropriate for your wall type, and a power drill with the correct drill bit. For concrete HDB walls, a hammer drill function is often necessary. |
| Step 2: Locate Wall Studs or Use Appropriate Anchors | Use a stud finder to locate wooden studs behind drywall, which provide the strongest anchor point. In Singapore’s concrete HDB walls, this is not an option. You must use high-quality wall plugs (cavity anchors for hollow walls or concrete anchors for solid walls) designed to hold the weight of your frame. |
| Step 3: Mark the Hanging Point | Measure and mark the exact spot on the wall where the screw will go. If using a wire or D-rings on the frame, measure the distance from the top of the frame to the taut wire or the D-ring. This tells you how far below your desired top-of-frame point the screw needs to be. |
| Step 4: Drill the Pilot Hole | Select a drill bit that matches the size of your wall plug. Drill straight into the wall at your marked point to the required depth. For concrete, apply firm, steady pressure and use the hammer function on your drill. |
| Step 6: Secure the Screw | Partially screw the screw into the wall plug, leaving enough of the head protruding to catch the picture frame wire or D-ring. Do not fully tighten yet if adjustments are expected. |
| Step 7: Hang and Level | Carefully hang the frame on the screw. Use your spirit level on top of the frame to ensure it is perfectly horizontal. Make minor adjustments as needed by slightly repositioning the screw. |
Want to hang frames safely without damaging your HDB walls? FixFirst’s certified handymen use professional tools and HDB-compliant techniques to mount any frame securely
Navigating HDB Regulations and Wall Challenges
A crucial consideration for Singaporean homeowners is adhering to the Housing & Development Board’s (HDB) renovation guidelines. These guidelines, which can be referenced on the HDB website, generally prohibit drilling into structural beams and columns. Furthermore, internal walls, especially newer ones, may be constructed from hollow materials that require specific anchors. Understanding your wall composition is the first step to a safe and compliant installation. The risk of hitting electrical wires or plumbing behind walls, though low in certain areas, is another reason to proceed with caution and knowledge.
Why Choose a FixFirst Handyman To Install Your Wall-Mounted Picture Frames
While the DIY approach can be satisfying, entrusting the installation of your valuable wall mounted acrylic photo frames and art to a professional handyman service like FixFirst offers undeniable advantages and peace of mind.
✔️Expertise in Wall Types: Our handymen possess extensive knowledge of Singapore’s diverse wall constructions, from classic HDB concrete to modern drywall partitions. We instantly identify the best mounting method and anchors for each unique situation.
✔️Professional-Grade Tools and Hardware: We arrive equipped with powerful hammer drills, precise laser levels, and a comprehensive array of heavy-duty wall plugs and brackets, ensuring every wall mount frame is secured with the absolute best hardware for the job.
✔️Perfect Alignment, Every Time: Our experience guarantees perfectly level hangs and meticulously measured gallery walls. We eliminate the frustration of crooked frames and multiple unnecessary holes in your walls.
✔️Adherence to HDB Guidelines: We are thoroughly familiar with HDB’s drilling regulations, ensuring your installation is not only secure but also fully compliant, protecting your home’s integrity and your deposit.
✔️Time and Stress Savings: We handle the entire process—from planning the layout to the final hang—efficiently and cleanly, saving you hours of effort and potential headache.
✔️Liability and Assurance: Professional installation comes with a guarantee of workmanship. You can rest easy knowing your precious artwork and your walls are in safe, skilled hands.

Frequently Asked Questions (FAQs) about Wall Mounted Picture Frames in Singapore Homes
For very lightweight items, adhesive hooks and strips (like 3M Command™ strips) can be effective. However, for any wall mounted glass frame or heavier acrylic option, drilling with proper wall plugs is the only safe and reliable method. Adhesive methods can fail over time, especially in Singapore’s humidity.
With a proper wall plug and screw, a concrete wall can hold a significant amount of weight—often over 20kg for a single anchor. The limiting factor is usually the strength of the frame itself or the bracket. For very heavy items, like a large wall mounted display frame, multiple anchors should be used to distribute the weight.
Glass offers superior clarity and is more scratch-resistant but is heavy and can shatter. Acrylic (e.g., Perspex) is lightweight, shatterproof, and safer for children’s rooms or high-traffic areas, but it can be easier to scratch and may have a very slight tint compared to museum-grade glass.
Ensure you use the correct picture frame wall mounting brackets. D-rings with two screws are far more stable than a single sawtooth hanger. For a wall mount poster frames setup, also check that the screw head is snug within the bracket. Using a small piece of museum putty at the bottom corners of the frame can also anchor it to the wall.
Yes, but consider the humidity. Ensure the artwork inside is not original or moisture-sensitive. A wall mounted acrylic photo frames setup is preferable here as it will not shatter from steam or accidental impact. Ensure the mounting hardware is stainless steel or coated to prevent rust.
Use a soft, microfiber cloth dampened with a mixture of mild soap and water. Avoid paper towels, which can scratch. Spray the cleaner onto the cloth, not directly onto the acrylic, and wipe gently.
Pull the wire taut towards the top of the frame. Measure the distance from the top of the taut wire to the top of the frame. This is the offset. Then, decide how high you want the top of the frame to be. Your screw should be placed on the wall at that height minus the offset measurement.
Absolutely, this is a classic and effective placement. The key is to maintain a relationship between the furniture and the art. Hang the bottom of the frame approximately 15-25cm above the headboard or sofa back. The art should feel connected to the furniture, not floating high above it.
The careful selection and expert installation of wall mounted picture frames represent a final, powerful step in curating a home that is uniquely and personally yours. It is a process that blends aesthetic intuition with practical skill, transforming blank walls into narratives of your life and passions. While the DIY spirit is commendable, the precision, efficiency, and guaranteed security offered by a professional service like FixFirst ensure that your valuable artwork and your home’s walls are treated with the utmost care. Contact FixFirst today for a flawless installation of your wall-mounted frames and turn your vision into a stunning reality.