Over time, walls in your HDB flat may accumulate holes from nails, screws, or accidental damage. Whether you’re moving out, redecorating, or simply want to restore your walls to their original condition, covering up these holes is a straightforward task. However, the method you use will depend on the type of wall you’re dealing with. In HDB flats, walls can be made of concrete, drywall, or brick, each requiring a slightly different approach. Here’s a comprehensive guide to help you cover up holes in your HDB walls like a pro.
Identifying Your Wall Type
Before you start, it’s important to identify the type of wall you’re working with. HDB flats typically feature three main wall types:
- Concrete Load-Bearing Walls. These are thick, sturdy walls that support the building’s structure, and they are recognizable as thick black blocks on your floor plan. Holes in these walls are usually small and shallow, such as those left by nails or screws.
- Partition Dry Walls. These are non-load-bearing walls made of lightweight materials like gypsum or plasterboard. Holes in drywall can range from small nail holes to larger cracks or punctures.
- Brick Walls. Found in older HDB flats, these walls are made of bricks and mortar. Holes in brick walls are often deeper and may require more effort and technical skills to fill.
Tools and Materials You’ll Need
Regardless of the wall type, you’ll need the following tools and materials:
☑️ Spackling paste or wall putty for filling small holes.
☑️ Joint compound for larger holes in drywall.
☑️ Sandpaper for smoothing the surface after filling.
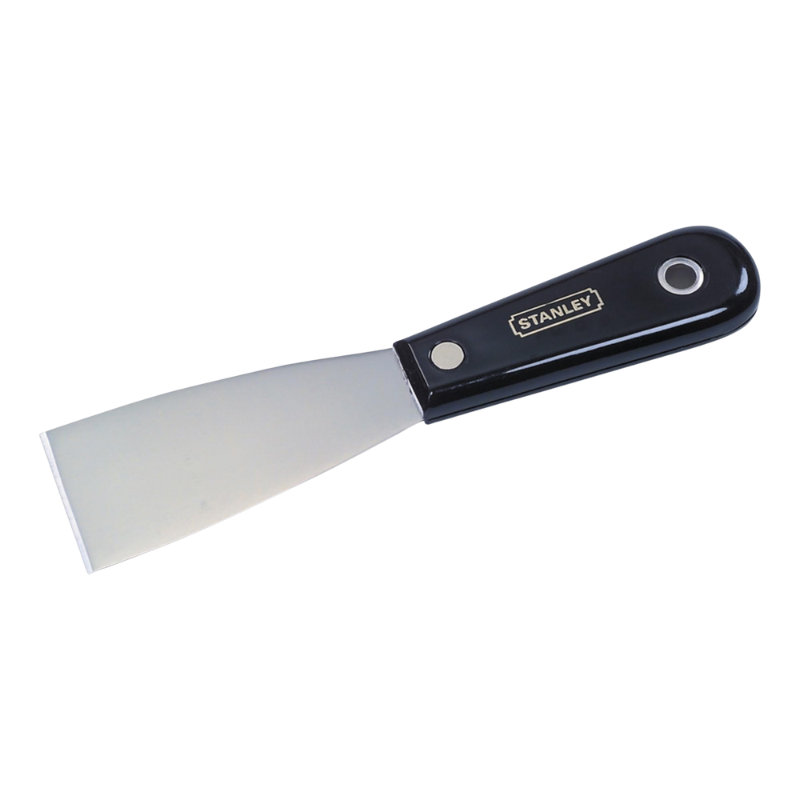
☑️ Putty knife or spatula for applying filler.
☑️ Paint and paintbrush for touching up the repaired area.
☑️ Primer to ensure the repaired area blends seamlessly with the rest of the wall.




Covering Up Holes in Concrete Walls
Small Holes (Nail or Screw Holes)
- Clean the hole. Remove any loose debris or dust from the hole using a brush or cloth.
- Apply spackling paste. Use a putty knife to fill the hole with spackling paste or wall putty. Press the filler firmly into the hole to ensure it’s fully filled.
- Smooth the surface. Scrape off any excess filler with the putty knife and let it dry completely.
- Sand the area. Once dry, sand the area lightly with fine-grit sandpaper to create a smooth surface.
- Touch up with paint. Apply a coat of primer to the repaired area, followed by paint that matches the rest of the wall.
Larger Holes
For larger holes in concrete walls, you may need to use a patching compound or cement-based filler. Follow the same steps as above, but allow more time for the filler to dry before sanding and painting.
Covering Up Holes in Dry Walls
Small Holes (Nail or Screw Holes)
- Clean the hole. Remove any loose debris or dust.
- Apply spackling paste. Use a putty knife to fill the hole with spackling paste. Ensure the filler is level with the wall surface.
- Smooth and sand. Scrape off excess filler and let it dry. Then sand the area lightly for a smooth finish.
- Touch up with paint. Apply primer and paint to match the wall.
Medium to Large Holes
- Clean the hole. Remove any loose debris or dust.
- Apply joint compound. Use a putty knife to fill the hole with joint compound. For larger holes, you may need to apply the compound in layers, allowing each layer to dry before applying the next.
- Reinforce with mesh tape (optional). For holes larger than 5cm, consider using mesh tape to reinforce the area before applying the joint compound.
- Smooth and sand. Once the compound is dry, sand the area lightly for a smooth finish.
- Touch up with paint. Apply primer and paint to match the wall.
Covering Up Holes in Brick Walls
Small Holes
- Clean the hole. Remove any loose debris or dust.
- Apply mortar or cement-based filler. Use a putty knife to fill the hole with mortar or a cement-based filler. Press the filler firmly into the hole.
- Smooth the surface. Scrape off excess filler and let it dry completely.
- Sand the area. Sand the area lightly for a smooth finish.
- Touch up with paint. Apply primer and paint to match the wall.
Larger Holes
For larger holes in brick walls, you may need to use a patching compound or mortar mix. Follow the same steps as above, but allow more time for the filler to dry before sanding and painting.
How to Fill Up Drill Holes in Walls
After the necessary installations, from shelves to television mounts, you are often left with the task of restoring your wall’s pristine condition. Knowing how to fill up drill holes in walls is a fundamental skill for any Singaporean homeowner, especially when living in an HDB flat where walls are predominantly finished with plaster. The process is straightforward but demands attention to detail for a truly invisible repair. The primary goal is not just to plug the hole, but to recreate a uniform surface that blends perfectly with the surrounding area, ready for a fresh coat of paint.
The first step involves preparing the hole and selecting the correct filler. For small holes left by screws or drill bits, a ready-mixed interior wall filler or spackling paste is ideal. These products are widely available at local hardware stores and are designed for easy application. Begin by clearing the hole of any loose debris or dust; a quick blast of air or a gentle brush can accomplish this. If the hole is particularly deep or wide, consider slightly undercutting its edges with a utility knife to give the filler a better mechanical grip. Then, using a small putty knife or even a finger, firmly press the filler into the cavity. The key is to overfill the hole slightly, as most fillers shrink marginally as they dry.
Once the filler is applied, the most critical phase begins: finishing and sanding. Allow the filler to dry completely according to the manufacturer’s instructions; rushing this step will only lead to a subpar result. After it has hardened, you will need to sand the area until it is perfectly smooth and flush with the rest of the wall. Use a fine-grit sanding block for this task, working in gentle, circular motions to feather the edges of the repair. For a professional finish, hold a light at a shallow angle to the wall to check for any bumps or dips you might have missed. This technique highlights imperfections that are not visible under direct light, ensuring your repair is truly flat.
The final act of restoration involves priming and painting. A common oversight is painting directly over the repaired spot, as the porous nature of the filler will absorb paint differently than the existing wall, creating a visible patch. To prevent this, first apply a thin coat of primer over the sanded area. This seals the filler and provides a consistent base for your topcoat. Once the primer is dry, you can paint over the spot. For the best results, it is often advisable to paint the entire wall segment from corner to corner, as matching the exact sheen and colour of aged paint can be challenging, even with an original touch-up can. This comprehensive approach guarantees a flawless, uniform finish that makes the original drill hole disappear completely.
Tips for a Seamless Finish

☑️ Match the paint. To ensure the repaired area blends seamlessly, use the same paint color and finish as the rest of the wall. If you don’t have the original paint, take a sample to a hardware store for matching.
☑️ Feather the edges. When applying filler or joint compound, feather the edges to blend them with the surrounding wall. This prevents the repair from being noticeable.
☑️ Use a primer. Always apply a coat of primer before painting. This helps the paint adhere better and ensures an even finish.
☑️ Work in good lighting. Proper lighting helps you spot imperfections and ensures a smooth, professional-looking repair.
When To Call a Professional
While covering up small holes is a DIY-friendly task, larger damages or structural issues may require professional help. If you’re dealing with extensive cracks, holes, or unsure about the wall’s condition, it’s best to consult a handyman or contractor. They can assess the damage and provide a long-lasting solution.
All in all, covering up holes in the walls of your HDB flat is a simple and cost-effective way to maintain your home’s appearance. Whether you’re dealing with concrete, drywall, or brick walls, the key is to use the right materials and techniques for each wall type. By following these tips, you can achieve a seamless finish and restore your walls to their original condition. Happy repairing!
Drill your wall like a professional handyman. Drill safely and properly, without damaging your property. Refer to our other handy guides and unique drilling tips for HDB units:
🔩How To Drill a Hole in a Wall: A Comprehensive Guide
🔩Best Drill Bit for Concrete Walls in BTO HDB Units
🔩How To Choose the Right Drill for Your HDB Wall: A Complete Guide
🔩Why Can’t You Drill Into Your Wall: Understanding HDB Regulations and Wall Types in Singapore
🔩Things to Prepare Before Drilling Into Your Wall: A Guide for HDB Flats in Singapore