A wall mounted glass cabinet presents a brilliant solution for style and storage. These floating displays transform empty walls into focal points, showcasing cherished collectibles, fine china, or personal treasures without consuming precious floor area. For HDB dwellers, this approach uses vertical space, creating an impression of openness and curated elegance. However, the journey from selecting the perfect unit to enjoying it securely on your wall involves careful planning, an understanding of your space, and adherence to local regulations. This guide explores every facet of choosing and installing a wall mounted glass cabinet in Singapore, ensuring your display is both beautiful and built to last.
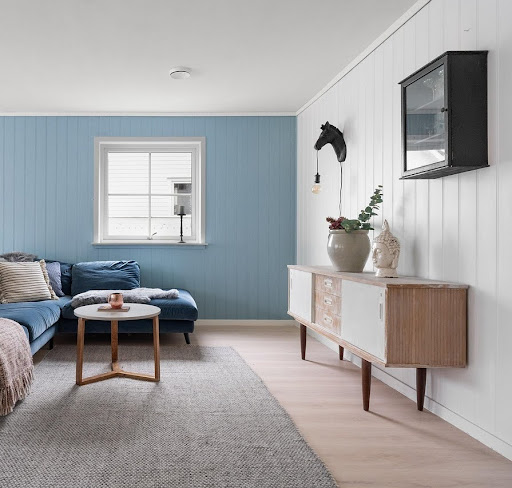
The Purpose and Appeal of Wall Mounted Glass Cabinets
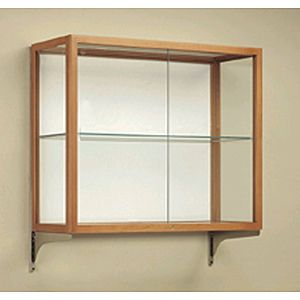
A wall mounted glass cabinet serves a dual purpose: it is both a protective vault and a public gallery for your valued possessions. In a typical Singaporean home, where humidity and dust are constant companions, a cabinet with sealed glass doors shields delicate items from environmental damage and keeps them pristine with minimal effort. More than just storage, it elevates everyday objects into a curated collection, adding a personal narrative to your living room, hallway, or dining area. By freeing up floor space, it answers the common challenge of limited square footage, making a room feel larger and more organised. The psychological effect is significant; a well-placed display creates visual interest, reflects your personality, and can become a conversation piece for guests.
Choosing Your Ideal Wall Mounted Glass Cabinet
Selecting the right cabinet involves matching your aesthetic desires with functional needs and spatial constraints. The market offers a spectrum from ready-to-assemble units to full custom builds. The following table summarises the primary types, their best uses, and key considerations for Singaporean homes.
| Cabinet Type | Description & Materials | Ideal Use Cases | Key Considerations for Singapore |
|---|---|---|---|
| Ready to Assemble (RTA) Units (e.g., IKEA) | Frame: Particleboard with foil/laminate. Doors: Tempered glass or clear plastic. Shelves: Adjustable particleboard or glass. | Displaying lightweight collectibles, books, or decorative items in living rooms or bedrooms. A budget-friendly starting point. | Check maximum load capacity (often 12–25kg). Humidity can affect particleboard over time. Ensure wall type is suitable for included fittings. |
| Solid Wood & Custom Built | Frame: Solid timber (e.g., Rubberwood, Oak). Doors: Tempered glass with aluminum or wood frames. Shelves: Adjustable solid wood or glass. | Showcasing heirloom china, premium collectibles, or creating a built-in look for dining rooms and hallways. | Offers superior stability and durability in humid climates. Can be made-to-measure for awkward spaces. Higher cost but long-term value. |
| Modern Aluminum & Glass | Frame: Powder-coated aluminum. Doors: Large panels of tempered clear or frosted glass. Shelves: Typically glass. | Creating a sleek, minimalist, or industrial aesthetic in contemporary HDB flats. Excellent for highlighting single, striking items. | Very resistant to humidity and warping. Lightweight yet strong. Often features clean lines and a floating visual effect. |
When evaluating a wall mounted glass cabinet, also consider the door style. Sliding doors save clearance space, perfect for tight walkways, while hinged casement doors offer a more traditional, full-view access. The inclusion of cabinet lighting, such as integrated LED strips, can dramatically enhance your display, adding brilliance and focus to your items.
Step-by-Step Professional Installation Guide
A secure installation is the most critical step. While DIY is tempting, the risks of improper mounting in an HDB flat are high. Here is the professional process we follow to ensure a stable wall mount:
| Step | Details |
|---|---|
| Step 1: Initial Site Assessment and Planning | We identify the ideal location, considering visibility, lighting, and wall structure. We use a stud finder to locate solid wooden battens or concrete sections for secure anchoring, strictly avoiding electrical wires and prohibited structural elements. |
| Step 2: Wall Preparation and Marking | Based on the cabinet’s mounting system, we precisely mark the drill points on the wall using a level to guarantee perfect alignment. This step is crucial for the final appearance. |
| Step 3: Drilling and Anchor Installation | Using a drill with a masonry bit appropriate for HDB walls, we create holes at the marked points. We then insert heavy-duty wall anchors (expansion plugs, toggle bolts, or chemical anchors) that are rated to hold more weight than the cabinet’s load. |
| Step 4: Mounting Rail and Bracket Fixing | We securely screw the included suspension rail or mounting brackets directly into the installed wall anchors. The rail system is then checked for absolute level and stability. |
| Step 5: Cabinet Assembly and Hanging | Following the manufacturer’s instructions, we assemble the cabinet frame and shelves. The pre-attached hanging mechanisms on the cabinet are then carefully engaged with the wall-mounted rail or brackets. |
| Step 6: Door Installation and Final Adjustment | The wall mounted cabinet glass doors are fitted and adjusted. We ensure hinges are tight and doors open/close smoothly, often with a soft-closing mechanism. All shelves are leveled, and the entire unit is given a final stability check. |
Installing a wall-mounted cabinet like an IKEA glass unit requires expertise to avoid common DIY mistakes such as misalignment, weak anchoring, or water damage from improper sealing. FixFirst’s certified handymen specialize in secure, damage-free installations on all HDB wall types. We ensure your cabinet is perfectly level, safely anchored, and built to last—even when fully loaded.
For products like an IKEA wall mounted glass cabinet, this process ensures the unit performs as designed, mitigating the common DIY pitfalls of uneven hanging or inadequate support.
Why Choose a FixFirst Handyman To Install Your Wall-Mounted Glass Cabinet
Installing a cabinet is about following instructions as well as applying experience to the unique challenges of your home.
✔️ Expertise in HDB Compliance: Our professionals are thoroughly familiar with HDB renovation guidelines. We know where it is safe to drill and which anchoring systems are best for your specific wall type, ensuring your installation is secure and fully compliant.
✔️ Precision and Right Tools: We arrive equipped with professional-grade stud finders, heavy-duty drills, levels, and a full array of anchors. This guarantees perfect alignment, solid mounting, and a flawless final look that DIY efforts often struggle to achieve.
✔️ Risk Mitigation: Our expertise prevents costly damage to hidden pipes, electrical conduits, or the wall itself, and we ensure the cabinet is mounted with a safety margin above its stated weight capacity.
✔️ Time and Stress Savings: What might take a homeowner a frustrating day or weekend, our team completes efficiently and correctly in a matter of hours. You get a guaranteed, professional result without the physical effort or anxiety.
✔️ Integrated Problem-Solving: If we encounter an unexpected obstacle—like an irregular wall surface or the need for custom reinforcement—we have the knowledge to implement an effective solution on the spot, a service beyond the scope of a standard DIY manual.

Frequently Asked Questions (FAQs) about Wall Mounted Glass Cabinets in Singapore Homes
The weight limit depends entirely on your wall material (concrete, brick, drywall) and the quality of the wall anchors used, not just the cabinet’s design. A professional installer will select anchors rated for multiple times the cabinet’s weight to ensure safety.
Yes, but it requires special hollow-wall anchors (like toggle bolts) and must be installed into the vertical metal studs behind the drywall, not just the plasterboard itself. The load capacity will be lower than on a concrete wall.
While functional, the particleboard in some RTA units can be susceptible to swelling over years in high humidity. For longevity, look for units with moisture-resistant materials or consider solid wood or aluminum-framed custom options which are more climate-resilient.
Use a soft, damp microfiber cloth with a mild glass cleaner. Avoid abrasive sponges or harsh chemicals. For aluminum frames, a damp cloth with mild soap is sufficient. Regularly check and tighten any accessible screws or hinges to maintain stability.
Absolutely. Low-voltage LED light strips are ideal. They produce minimal heat and can be installed along the top front edge or inside the cabinet frame. The cable can often be discreetly routed through a hole in the cabinet back.
An RTA unit is a budget-friendly option, often costing a few hundred dollars. A custom solid wood or aluminum-framed wall mounted glass cabinet offers superior durability, exact sizing, and premium finishes, typically ranging from several hundred to a few thousand dollars, representing a long-term investment in your home.
A wall mounted glass cabinet is a fantastic design choice for enhancing your living space and expressing your style. The process—from selecting the right type and understanding HDB rules to the final precise installation—determines both its beauty and longevity. While the appeal of DIY is understandable, the security of your display and your home’s walls warrants professional expertise.
Contact FixFirst today. Our experienced handymen will handle everything from site assessment to flawless installation, ensuring your new wall mounted glass cabinet is a secure, stunning, and stress-free addition to your Singapore home.