Mounting a Sony television on your wall is a decision that redefines a living space. In the context of Singapore’s HDB flats, a successful Sony TV wall mount installation does far more than just lift a screen off a console. It is a strategic home improvement that reclaims valuable floor area, creates an immersive viewing theatre, and complements the sophisticated engineering of Sony’s Bravia and OLED displays. However, achieving that sleek, floating screen effect demands careful navigation of local housing regulations, a precise match between bracket and television, and an installation executed with accuracy. This guide provides the complete framework for your project, from selecting the correct Sony wall mount bracket for a specific model like the Sony KDL 50W800B to understanding the intricacies of a safe installation in your home.

Understanding the Purpose and Benefits of a Wall-Mounted Sony TV
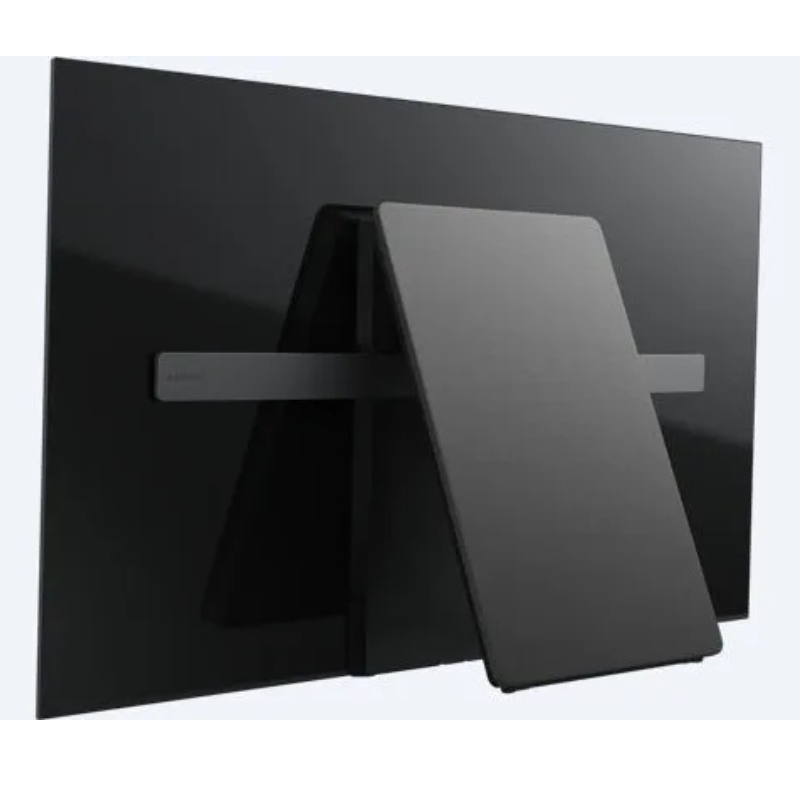
Choosing a Sony TV wall mount delivers benefits that extend well beyond simple aesthetics. The most tangible advantage is the immediate liberation of space. Removing the need for a television cabinet frees up square footage, allowing for a more open and flexible room layout. This shift also offers superior ergonomic control. You can position the screen at the exact height that aligns with your seated eye level, which is a critical factor in reducing neck and eye strain during extended viewing sessions. The ability to angle the television slightly also helps manage glare from windows, a common consideration in our sunlit flats. For owners of Sony’s premium models, such as those researching an Sony A9F wall mount, the right bracket can preserve the designer’s intent, allowing the screen to sit almost flush with the wall for a breathtaking, gallery-like display that does justice to the picture quality.
Navigating HDB Regulations for Safe TV Installation
Before purchasing a bracket or planning the layout, a clear understanding of the Housing & Development Board’s (HDB) renovation guidelines is an essential first step. These rules exist to protect the structural safety of the building and ensure harmony among residents. While a standard Sony TV wall mount installation typically does not require a formal renovation permit, the activity is strictly governed by important conditions.
A critical rule prohibits “drilling of holes through beams, columns, and other structural members.” Accidentally drilling into a reinforced concrete beam can compromise safety and lead to significant repair costs. Furthermore, HDB enforces specific “permitted hours” for noisy work. Activities like drilling are generally restricted to weekdays between 9:00 am and 5:00 pm and are not allowed on Saturdays, Sundays, or public holidays. For homeowners, this underscores the value of engaging a professional service that can expertly identify safe drilling zones, avoid concealed electrical wiring and plumbing, and complete the work within the compliant timeframe, ensuring your project adheres fully to local regulations.
Choosing the Correct Wall Mount for Your Sony Television
Selecting the appropriate bracket is the most important technical decision in the process. Your choice must be guided by your specific Sony model’s design, its size and weight, and your desired viewing flexibility. The process begins with two key specifications: your TV’s VESA pattern (the standardized distance between the four mounting holes on the back) and its weight. This information is vital whether you are sourcing a wall mount for Sony Bravia 40 inch TV or planning an Sony A1E wall mount for a premium OLED. Screw specifications are equally crucial; using incorrect screws can damage your television’s internal frame.
Fixed or Low-Profile Mounts hold the TV close against the wall. This option creates a clean, built-in look and is ideal for rooms where the viewing angle is constant. For a straightforward setup like a Sony Bravia wall mount 32 inch, a fixed bracket offers a cost-effective and neat solution that maximizes stability.
Tilting Mounts allow you to angle the TV vertically, usually up to 15 degrees. This function is highly practical for installations above eye level, such as when the TV is placed higher on a living room wall. A tilt mechanism helps direct the screen downward for improved viewing comfort and is a common feature sought in a Sony TV wall mount bracket.
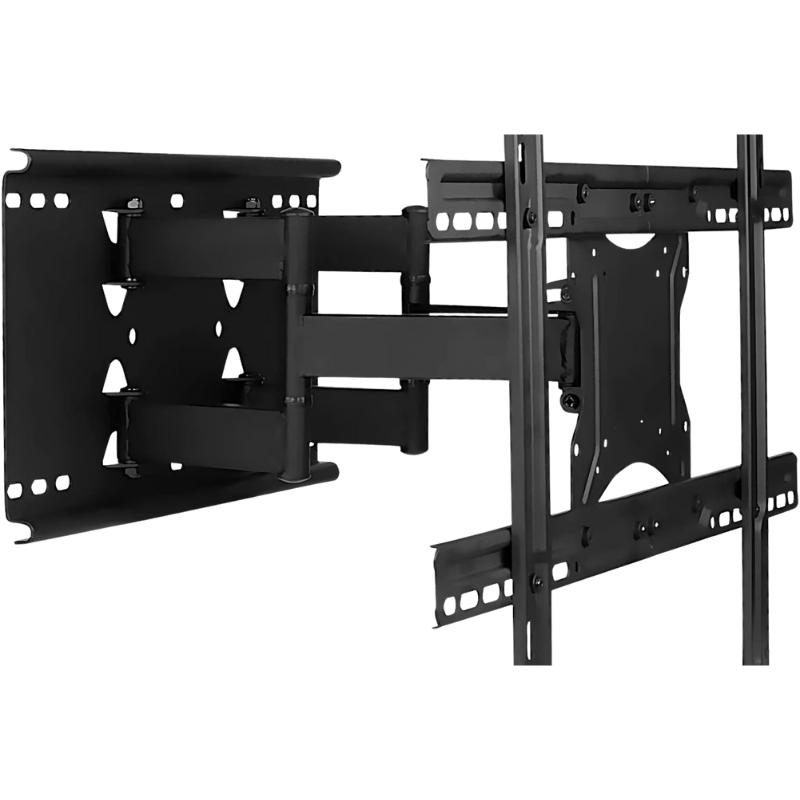
Full-Motion or Articulating Mounts offer the greatest flexibility, enabling the TV to swivel left and right, tilt, and extend from the wall. These are perfect for open-plan living and dining areas or tight corners where you need to adjust the viewing angle from various seating positions. For larger screens, a robust, dual-arm full-motion bracket is recommended to safely handle the weight and leverage.
Summary of Sony TV Wall Mount Types and Singapore Home Applications
| Mount Type | Best For Sony TV Models/Series | Key Features | Ideal Use Cases in HDB Flats |
|---|---|---|---|
| Fixed Mount | Basic and mid-range models (e.g., Sony 32 inch LED TV wall mount stand, Sony KDL 40W650D wall mount) | Flush to wall, maximum stability, clean look. | Bedrooms, study rooms, or kitchens with a single, direct viewing angle. |
| Tilting Mount | Mid-range to larger Bravia models (e.g., Sony KDL 55W800C wall mount, wall mount for Sony Bravia 55 inch) | Adjustable vertical tilt to reduce glare and adjust angle. | Living rooms where the TV is mounted higher than the primary seating area. |
| Full-Motion Mount | Large screen & premium models (e.g., Sony KDL50W800C wall mount, OLED series) | Swivels, tilts, and extends for flexible viewing. | Open-plan living/dining areas, corners, or rooms requiring viewing from multiple positions. |
For further information, refer to these Sony TV manuals:
- Wall mounting your OLED TV (A9F Series)
- Wall mounting your BRAVIA TVs (2024 models)
Compatible Wall-Mount Brackets and Screw Hole Measurements for BRAVIA TV (2015-2025 models)
A Professional’s Guide to Mounting Your Sony TV
A proper Sony TV wall mount installation is a meticulous process that prioritizes safety and precision. Following the Sony Bravia wall mount instructions that come with your specific bracket is paramount. Here is a detailed, professional step-by-step approach:
| Step | Details |
|---|---|
| Step 1: Plan and Assess the Location | Determine the optimal viewing height. A standard guideline is to position the center of the screen at seated eye level (approximately 105–120cm from the floor). Use a reliable electronic stud finder to locate the solid wooden or metal studs within your HDB wall. Anchoring directly into plaster or drywall without a stud is unsafe for any television, especially larger models. |
| Step 2: Prepare the TV and Mark the Wall | Attach the mounting arms to the back of your Sony TV using the correct Sony Bravia TV wall mount screws as specified in your manual. Hold the wall plate against the wall at your chosen height, ensuring it is perfectly level using a spirit or laser level. Mark the drilling points on the wall through the holes in the plate. |
| Step 3: Secure the Wall Plate | At the marked points, drill pilot holes into the centre of the wall studs. The diameter and depth should match the heavy-duty wall anchors you are using. Insert the anchors, align the wall plate, and secure it firmly to the wall with the provided bolts. Double-check that the plate is level and does not move. |
| Step 4: Hang the Television and Secure | With the help of a second person, carefully lift and hook the TV onto the secured wall plate. Engage any safety locks or clips provided by the bracket mechanism. Before releasing the full weight, gently test the stability of the connection. |
| Step 5: Final Adjustments and Cable Management | Make any final adjustments to the tilt or swivel angle. Organize all power and HDMI cables using adhesive-backed clips, cable channels, or in-wall conduits to achieve a clean, professional look. This final step is essential for safety and aesthetics. |
Need help mounting your Sony TV? FixFirst’s certified handymen provide safe, professional installation across all HDB flat types. We handle everything from stud detection and hardware selection to cable management and final alignment. Whether it’s a basic 32-inch setup or a premium Bravia OLED, we ensure your TV is secure, level, and ready to enjoy—without the risk of DIY damage or instability.



Why Choose a FixFirst Handyman for Your Sony TV Wall Mount Service
✔️ Adherence to HDB Guidelines and Building Knowledge: Our technicians possess in-depth knowledge of HDB construction standards and renovation rules. We identify safe mounting locations, strictly avoid structural beams and concealed wiring, and schedule all work within the official permitted hours.
✔️ Precision Installation with Correct Hardware: We arrive equipped with professional tools, including levels, torque-controlled drills, and a full complement of hardware. We ensure your specific Sony TV wall mount bracket is installed perfectly level and anchored with the correct screws and wall fixings for your model and wall type.
✔️ Safety as the Foremost Priority: We treat the safety of your household and your property with utmost seriousness. Our methods prevent damage to walls and hidden utilities. We verify that every mount is installed with a significant safety margin above your TV’s weight.
✔️ Integrated Solutions for a Complete Setup: Our service extends beyond just the bracket. We provide expert cable management to hide unsightly wires and can advise on or install compatible accessories, such as a Sony HT ST5000 wall mount for your soundbar, creating a unified, tidy entertainment system.
✔️ Efficiency, Warranty, and Peace of Mind: We complete the job correctly and efficiently in one visit, saving you time and potential frustration. Professional installation also helps maintain the validity of your television’s manufacturer warranty.

Frequently Asked Questions on Sony TV Wall Mounting
While not always mandatory, purchasing an official Sony Bravia wall mount kit or a high-quality third-party bracket that is VESA-compatible is strongly recommended. Official kits are guaranteed to fit your model perfectly, often come with the exact Sony Bravia TV wall mount screws required, and may offer a sleeker design. The Sony Bravia wall mount bracket price for an official kit can vary, so it’s worth comparing with certified universal brackets.
The VESA pattern is always listed in your TV’s user manual and on the official Sony support website. You can also measure it directly: turn off and secure the TV, then measure the horizontal and vertical distances (in millimetres) between the four mounting holes on the back panel.
Yes, but with critical precautions. HDB guidelines state that fasteners must not exceed 40mm in penetration depth for partition walls. The load per bolt is also limited. This requires specific low-profile anchors and careful weight distribution. For heavier TVs, like a 55-inch model, professional assessment is strongly advised to ensure the wall can safely support the load.
The fundamental process is the same regardless of size, but safety scales with the TV. For any size, the key steps are: locating wall studs, using the correct bracket and screws, securing the wall plate level, and having at least two people to lift and hang the TV. For larger TVs, the need for a heavy-duty bracket and more robust wall anchors increases significantly.
Many modern Sony TV wall mount brackets are designed with soundbar compatibility. Some brackets feature an integrated shelf or specific mounting points beneath the TV for attaching a soundbar like the Sony HT ST5000. When selecting a mount, check its product specifications to confirm soundbar support.
You can purchase official Sony accessories from authorized retailers like Sony Stores, Harvey Norman, or Courts. A wide range of compatible universal brackets is also available from electronics shops, DIY stores like HomeFix, and online marketplaces such as Lazada and Shopee. Always verify VESA compatibility and weight ratings before purchase.
Mounting your Sony Bravia or OLED TV on the wall is a superb way to invest in your home’s comfort and modern appeal. The journey from box to breathtaking display, however, requires precision, an understanding of HDB building rules, and the right partnership for installation. Whether you are installing a simple Sony Bravia wall mount 32 inch or configuring a sophisticated setup for a premium OLED, professional expertise makes the definitive difference. It protects your significant investment, guarantees the safety of your home, and delivers the flawless, immersive viewing experience that Sony’s technology deserves.
Contact FixFirst today to schedule an installation with our skilled handymen. We provide expert, fully compliant Sony TV wall mount installation across Singapore, handling everything from initial planning and bracket selection to flawless cable management.