Floor standing speakers earn their place in a serious audio setup. They deliver the warmth and scale that slim soundbars rarely match. Yet in an HDB living room, those tall cabinets compete for floor space with the sofa, coffee table, and children’s play area. Wall mounting speakers frees up the floor, lifts the tweeters closer to ear level, and keeps them safe from an accidental kick or a vacuum cleaner bump. The idea of a wall mount floor standing speakers installation can sound intimidating, but with the right bracket and the correct anchors, a speaker weighing 25 kilograms sits on the wall just as securely as a television.

Why Hang a Heavy Cabinet Instead of Buying Bookshelf Speakers
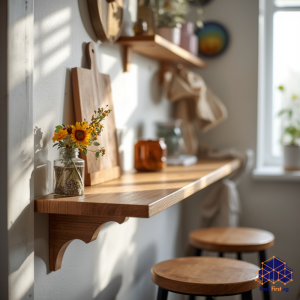
Many Singaporean homeowners already own a pair of floor standers they love. Replacing them with smaller satellites means spending more money and losing the bass extension a larger cabinet provides. Wall mounting preserves your existing investment while reclaiming square footage. It also positions the drivers above furniture obstructions. A speaker placed directly on the floor often shoots the midrange into the back of a sofa. Lifting the cabinet 60 to 80 centimetres off the ground lines up the acoustic centre with the listener’s head, delivering clearer dialogue and a more precise stereo image. A well-executed wall mount floor standing speakers project transforms the room without changing a single component in your signal chain.
The Anchor Problem: Concrete, Hollow Block, and Drywall
Wall mounting a floor standing speaker differs from hanging a television in one critical aspect: the cabinet extends far forward from the wall. A typical floor stander may measure 30 to 35 centimetres in depth, creating a substantial lever arm. Every kilogram of speaker mass translates into a pull-out force much greater than that of a flat screen. On a solid concrete wall, you need expanding sleeve anchors or chemical anchors with threaded rods. M8 anchors might hold a small bookshelf speaker, but a full floor stander calls for M10 or M12 anchors embedded at least 60 millimetres deep. The anchor must reach past any plaster skim coat into the structural concrete.
Hollow concrete blocks, common in older HDB flats, demand large-diameter toggle bolts or specialised hollow-wall sleeve anchors that clamp onto the inside face of the block cavity. Drywall partitions that enclose studies or divide bedrooms rarely have the strength for this task. If you must wall mount floor standing speakers on drywall, the only safe path is to locate the metal studs behind the board, bolt a plywood backer plate across two studs, and then mount the bracket onto that plate. Skipping the backing plate sends the speaker crashing down, ripping a hole through the plasterboard on its way.
Choosing a Bracket That Matches the Speaker’s Shape
Floor standing speakers do not have VESA mounting patterns. They lack threaded inserts on the back, and their cabinets taper or curve in ways that reject a flat plate. The most reliable approach uses an L-shaped shelf bracket or a purpose-built speaker wall mount that cradles the cabinet from below and secures it with a strap or clamp at the top. The shelf carries the vertical load, while the top clamp prevents tipping. When you look for a bracket to wall mount floor standing speakers, check that the platform depth reaches at least two-thirds of the speaker’s depth. A shallow ledge concentrates all the weight on the front edge of the cabinet and can crack the MDF base over time. Also verify the bracket’s weight rating. A pair of floor standers can easily total 50 kilograms. Brackets engineered for studio monitors often top out at 15 kilograms per side and will not work.
Step-by-Step: How To Wall Mount Floor Standing Speakers Securely
| Step | Details |
|---|---|
| Step 1: Mark the desired height on the wall | The acoustic axis, usually the midpoint between the tweeter and the upper woofer, should align with your ear level when you sit down. Measure this height with the speaker standing on a temporary stack of books to confirm the sound before drilling any holes. |
| Step 2: Locate available wall studs or solid substrate | Use a stud finder for drywall or an impact sound test for concrete and block. Mark the positions for each bracket, ensuring the left and right brackets sit perfectly level with each other. |
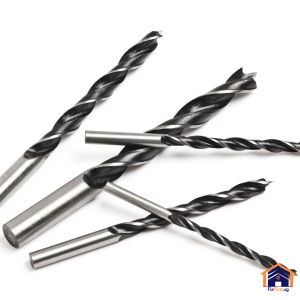
| Step 3: Drill anchor holes using the correct bit type and diameter | For concrete, a hammer drill with a carbide-tipped masonry bit works best. Clean each hole thoroughly with a brush and a puffer. Debris left inside reduces anchor grip by more than 30 percent. |
| Step 4: Install the anchors or wall plugs | If you use sleeve anchors, tap them in gently and tighten until the wedge bites. For chemical anchors, inject the epoxy into the hole, insert the threaded rod, and wait for the full cure time before attaching the bracket. |
| Step 5: Bolt the shelf bracket to the wall | Place a flat washer followed by a spring washer under each nut. Tighten progressively so the bracket draws flush without tilting. Check level across both brackets with a long spirit level. |
| Step 6: Place the speaker onto the shelf, then engage the top safety clamp or strap | The strap should cinch tight enough that the speaker cannot rock forward but not so tight that it compresses the cabinet and affects the internal bracing. |
| Step 7: Route the speaker cables | Clip them along the bracket’s underside or run them through surface trunking painted to match the wall. For a fully hidden look, a licensed electrician can chase the cables into the wall and install flush speaker terminals near each bracket. FixFirst completes the mounting and concealed wiring in one session so you get a clean wall without a second contractor visit. |
Want studio-quality speaker mounting done safely and neatly? FixFirst’s certified handymen install premium wall brackets for all speaker types—from bookshelf models to hi-fi towers. We handle concrete drilling, cable concealment, and perfect leveling. Book now for a clutter-free, audiophile-ready setup!
Electrical and Wiring Considerations for Wall-Mounted Speakers
A wall-mounted speaker sits far from the amplifier or AV receiver unless you planned the room layout around it. Long cable runs pick up hum if they cross power lines, so keep speaker cables at least 30 centimetres away from electrical wiring inside walls. If you install a dedicated power point behind each speaker for an active floor stander with built-in amplification, that work requires a licensed electrician in Singapore. Using an extension cord twisted behind a bracket violates both HDB guidelines and common sense. FixFirst electricians pull new circuits and terminate them in recessed sockets that hide behind the speaker cabinet, leaving no visible wiring.
Why a Professional Finish Matters
A floor standing speaker should sit flat against its bracket, level to the horizon, with all its mass carried by steel that bites deep into the wall. When you wall mount floor standing speakers correctly, you gain floor space, improve sound staging, and keep the cabinets out of harm’s way. The difference between a job that lasts a decade and one that fails in six months comes down to anchor selection and the patience to allow epoxy to cure fully. A speaker falling off the wall damages not only the speaker but also the wall, the floor, and possibly a family member. No shortcut justifies that outcome.
If you would rather hand the entire process to a team that understands HDB wall substrates and audio equipment weight distribution, call FixFirst or book online. We mount your floor standing speakers, run the cables, install power points if your speakers require them, and leave the room clean. You simply sit down and listen.