The pursuit of superior audio often leads us to consider the spatial dynamics of our living environments. In Singapore, where space is a prized commodity, mounting heavy speakers on the wall becomes a strategic decision to enhance both acoustics and aesthetics without sacrificing precious floor area. However, the process involves more than simply drilling a few holes. For residents of HDB flats, it demands a careful understanding of wall structures, adherence to official guidelines, and a meticulous approach to installation to ensure both safety and sonic performance. This comprehensive guide will walk you through every critical aspect of how to mount heavy speakers on wall, tailored specifically for the Singapore context.
Understanding the Foundations: HDB Walls and Regulations
Before you even purchase a speaker bracket, you must first understand the canvas you are working on. The walls in your HDB flat are not uniform; they consist primarily of two types: reinforced concrete walls and partition walls. Reinforced concrete walls are structural, incredibly strong, and capable of supporting significant weight. Partition walls, often made of hollow bricks or other lighter materials, are non-structural and cannot bear heavy loads.
The Housing & Development Board (HDB) has clear guidelines regarding renovation works, including drilling into walls. These rules are in place to maintain the structural integrity of the building and the safety of all residents. Drilling into structural beams or columns is strictly prohibited. When you plan to mount heavy speakers on wall, you must identify a concrete wall and ensure your installation does not compromise electrical conduits or plumbing hidden within. A professional handyman or installer will have the tools and expertise to locate these hazards, a step that is highly recommended for any significant installation.
Selecting the Appropriate Mounting Hardware
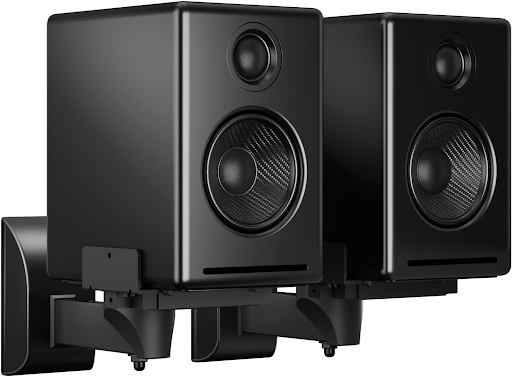
The integrity of your entire speaker mounting project rests on the hardware you select. For heavy bookshelf or surround sound speakers, a simple, lightweight plastic anchor will not suffice. The cornerstone of a secure installation is the mounting bracket itself. You must seek out heavy-duty brackets specifically rated for weights exceeding that of your speaker. Look for steel constructions with robust, reinforced welding at the joints.
The method of attachment to the wall is equally critical. For concrete walls, you will require concrete anchor bolts, often known as sleeve anchors or wedge anchors. These anchors expand inside the concrete, creating a powerful grip that resists pull-out forces. The size and rating of these anchors must correspond to both the weight of the speaker and the specifications of the bracket. Using undersized anchors is a primary cause of installation failure. For those uncertain about selecting the correct hardware, consulting with a service like FixFirst can provide peace of mind, ensuring that the components used are fit for purpose and guarantee long-term security.
Speaker Positioning
Where you place your speakers profoundly impacts your listening experience. Mounting them securely is only half the battle; positioning them correctly unlocks their true potential. For a stereo pair used for music, a common starting point is to form an equilateral triangle with your primary listening position. The speakers should be at ear level when you are seated, typically tweeters aligned with your ears, to create a detailed and coherent soundstage.
For home theater setups, the positioning follows different acoustic principles. The center channel speaker should be directly above or below your television, aimed towards the listener. The front left and right speakers should be placed at a slight angle towards the main seating area, while surround speakers are best positioned slightly behind and above the listening position. In an HDB setting, you must also consider room reflections. Hard surfaces like tile floors and large windows can cause sound to bounce, muddying the audio. Strategic use of rugs, curtains, and soft furnishings can dramatically improve sound clarity. This thoughtful approach to placement ensures that your effort to mount heavy speakers on the wall translates into a genuinely immersive auditory experience.
A Step-by-Step Guide to Secure Installation
Once you have planned the position and gathered your tools, the physical installation begins. This process requires precision and attention to detail to ensure a safe and successful outcome.
| Step | Details |
|---|---|
| Step 1: Locate Studs and Mark Drill Points | Use a high-quality stud finder to confirm you are drilling into a solid concrete wall and not a hollow partition. Once confirmed, hold the mounting bracket firmly against the wall in the desired location. Using a spirit level, ensure the bracket is perfectly horizontal. Mark the drilling points through the holes in the bracket with a pencil or marker. |
| Step 2: Drill Pilot Holes with Precision | Select a masonry drill bit that matches the diameter specified for your concrete anchors. Drill straight into the wall at your marked points to the required depth. It is advisable to use a drill stop or a piece of tape on the drill bit to prevent drilling too deep. Be prepared for resistance and drill steadily. |
| Step 3: Clear the Holes and Install Anchors | After drilling, remove the drill from the hole and use a vacuum or a blast of air to remove all concrete dust from the hole. A clean hole is essential for the anchor to expand and grip properly. Insert the concrete anchors into the cleaned holes. |
| Step 4: Attach the Bracket to the Wall | Position the bracket back over the installed anchors. Screw the provided bolts into the anchors, tightening them first by hand and then with a wrench or socket set. Tighten the bolts firmly and alternately, ensuring the bracket is drawn flush against the wall without any wobble. |
| Step 5: Secure the Speaker to the Bracket | With the wall plate securely installed, attach the corresponding plate to your speaker using the supplied screws. Ensure these screws are tight and a good fit for the speaker’s mounting threads. Then, carefully lift the speaker and engage it with the wall-mounted bracket, following the manufacturer’s locking mechanism instructions. |
| Step 6: Conduct a Final Safety Check | Apply gentle but firm downward and outward pressure on the installed speaker to test the stability of the bracket and the wall anchors. Do not be afraid to check; it is better to discover an issue now than after the speaker has fallen. Finally, route and secure your speaker wires neatly, avoiding any tangles or tripping hazards. |
Need a secure, damage-free wall-mounted speaker installation in your HDB flat? FixFirst’s certified handymen use professional tools and HDB-compliant techniques to ensure your mount is level, stable, and safe
Choosing the Right Mounting Hardware
Selecting the correct mounting hardware is the most critical step for a secure and successful installation. For many modern, lightweight satellite speakers, a generic speaker wall mount plate from a reputable brand like Videosecu speaker wall mounts can be perfectly adequate. These kits often offer the flexibility and strength needed for standard setups. However, you must move beyond generic solutions when dealing with heavier, more specialized equipment. It is never safe to use a generic kit for a product that requires a specific bracket, such as the Samsung HW N950 rear speaker wall mount or the Samsung HW Q90r rear speaker wall mount. These speakers have unique attachment points and weights that only their dedicated mounts are engineered to support. The same principle applies to professional studio monitors like the JBL 305p mkii wall mount and commercial-grade audio like the Toa wall mount speaker; always use the manufacturer’s recommended hardware to guarantee the integrity of your wall mounted loudspeakers. For any speaker over a few kilograms, or if you are mounting into unknown wall material, consulting a professional is the safest course of action to prevent damage to your equipment and your home.
What You Need To Know about Speaker Wall Mount Brackets Singapore
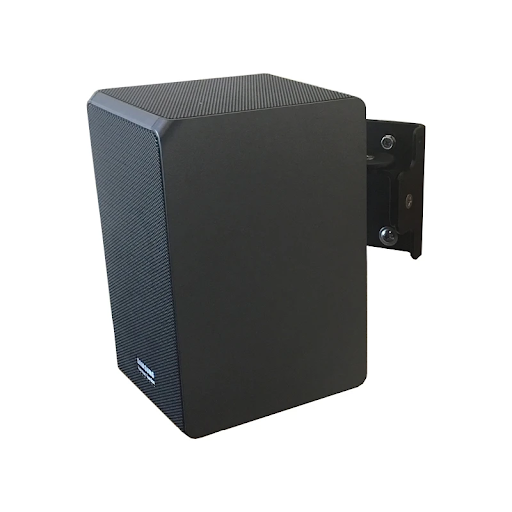
The choice of your speaker wall mount Singapore is the basis of your entire sound system. In the context of Singaporean homes, particularly HDB flats, this decision moves beyond a simple accessory purchase into a safety and performance consideration. The right hardware ensures your valuable speakers deliver crystal-clear audio without the threat of becoming a safety hazard. This deep dive into speaker wall mount brackets Singapore reveals why generic solutions often fall short and how specialized brackets make all the difference for a superior listening experience.
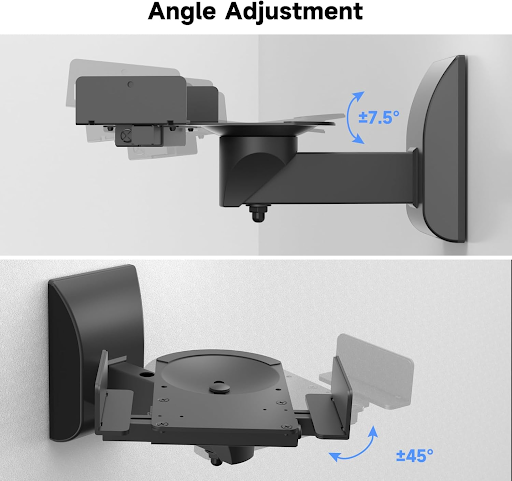
A proper speaker wall mount brackets Singapore solution is engineered from materials like reinforced steel, designed to manage not just the static weight of your speaker but also the dynamic forces of sound vibration and occasional accidental bumps. These brackets often feature adjustable tilt and swivel mechanisms, allowing you to fine-tune the direction of sound after installation to hit the perfect acoustic sweet spot in your room. This adjustability is crucial, as the ideal position for clear dialogue from a center channel speaker differs from the ambient diffusion desired for rear surround effects. Therefore, selecting a dedicated mount, such as those designed for specific systems, provides a fit and functionality that universal plates cannot match. For any installation, the integrity of the bracket is only as good as its union with the wall, which demands the correct heavy-duty concrete anchors for a truly permanent hold.
The real value of investing in the correct speaker wall mount Singapore hardware extends into compliance, acoustics, and long-term peace of mind. A secure installation using appropriate speaker wall mount brackets Singapore adheres to the spirit of HDB guidelines, preserving your home’s structure and ensuring the safety of your household. From a performance perspective, a rigid, well-engineered bracket prevents unwanted resonance and vibration that can muddy the speaker’s true tone, ensuring you hear every detail as the audio engineer intended. Ultimately, while the DIY route is possible, the complexity of matching bracket, anchor, wall type, and speaker specificities underscores the merit of professional assessment. Engaging a specialist ensures that your chosen speaker wall mount Singapore system is installed with precision so that your focus remains on enjoying the immersive soundscape of your favorite music or film.
Considering Room Acoustics
The placement of your wall mounted loudspeakers profoundly impacts the final sound quality in your living space. While a secure Samsung HW Q90r rear speaker wall mount ensures safety, its positioning dictates how sound waves interact with your room’s surfaces. In a typical Singaporean home, hard floors and parallel walls can create reflections and standing waves that muddy the audio. The location you choose for your JBL 305p mkii wall mount or a commercial Toa wall mount speaker should aim to minimize these acoustic issues. For instance, mounting a rear speaker like the one designed for a Samsung HW N950 rear speaker wall mount too close to a corner can artificially amplify bass frequencies. The type of bracket also plays a role; a rigid speaker wall mount plate from a reliable supplier like Videosecu speaker wall mounts prevents unwanted vibrations that can colour the sound. Ultimately, the goal is to position your speakers to create a cohesive soundstage, ensuring that your investment in high-quality audio delivers the immersive experience it was designed for.
Recognizing the Value of Professional Installation
While a DIY approach can be tempting, the task of mounting heavy, and often expensive, speakers carries inherent risks. A miscalculation in weight capacity, a misidentified wall type, or a poorly drilled hole can lead to damaged equipment, damaged walls, or even personal injury. The cost of repairing a cracked concrete wall or replacing a fallen speaker can far exceed the cost of professional installation from the outset.
Engaging a specialist service like FixFirst offers a comprehensive solution. Our experienced technicians bring the right tools, including heavy-duty drills and stud sensors, and the correct, high-load-rated hardware for your specific situation. We understand HDB regulations and can navigate the complexities of your home’s structure, ensuring a secure installation that complies with building codes. This professional service not only guarantees safety but also provides a warranty on the workmanship, allowing you to enjoy your audio system with absolute confidence.
Mounting heavy speakers on your wall is a transformative upgrade for any Singapore home, merging space-saving design with acoustic excellence. Yet, it is an undertaking where precision trumps haste and knowledge outweighs guesswork. From selecting industrial-grade brackets and navigating HDB wall compositions to achieving the perfect acoustic sweet spot, every step contributes to a secure and sonically rewarding outcome. While the empowered DIYer can follow these steps for success, the assurance of a flawless installation—one that protects your investment and your home—is invaluable. Do not leave the safety of your speakers and your household to chance. Contact FixFirst today for a professional, reliable installation you can trust, and elevate your home audio experience with complete peace of mind.