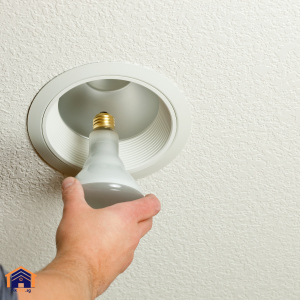
When your ceiling light fixture fails or becomes outdated, knowing how to change LED ceiling light or how to replace ceiling LED light properly is essential for both safety and optimal performance. In Singapore, where homes often feature integrated LED panels or downlights, the replacement process requires careful attention to electrical safety standards and fixture compatibility. This guide covers the step-by-step process while highlighting key considerations for Singaporean homeowners.
Preparation and Safety Measures
Before attempting to change your LED ceiling light, the first critical step is to turn off the electricity supply at the main circuit breaker. Singapore’s 230V household current can deliver dangerous shocks, so verifying power disconnection with a voltage tester is strongly recommended. Gather necessary tools such as insulated screwdrivers, wire strippers, and a stable ladder. For high ceilings or complex installations, consider engaging a Licensed Electrical Worker (LEW) to ensure compliance with the Energy Market Authority (EMA) safety regulations.
Removing the Existing LED Light Fixture
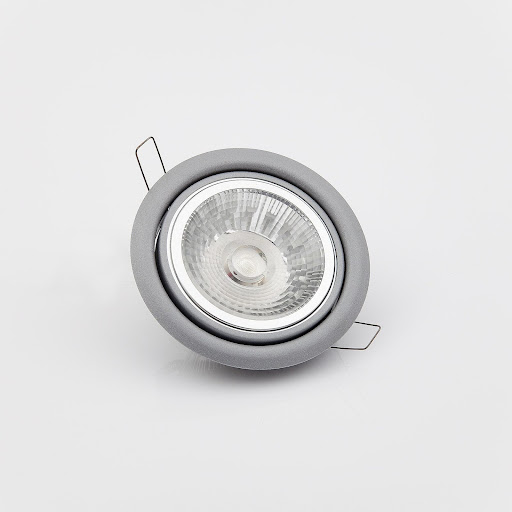
Most LED ceiling lights in Singapore fall into three categories: surface-mounted panels, recessed downlights, or modular LED arrays. For panel-style lights, start by removing the decorative cover (typically secured with clips or screws) to access the mounting frame. Recessed downlights usually feature spring-loaded brackets that require careful compression for removal. Take note of the wiring configuration – Singaporean electrical wiring installations generally use brown (live), blue (neutral), and green/yellow (earth) wires according to SS 472 standards. Photographing the original wiring setup provides valuable reference during reinstallation.
Selecting a Compatible Replacement Unit
When choosing a new LED ceiling light, verify compatibility with your existing setup. Singapore’s electrical infrastructure operates on 230V AC at 50Hz, so ensure the replacement unit matches these specifications. Key factors include the fixture’s dimensions (especially critical for recessed lights), lumen output (measured in lumens, not watts), and color temperature (2700K-6500K). For HDB flats, check if the new fixture complies with the HDB guidelines on electrical works, including weight limits, heat dissipation, and embedded wiring. Dimmable LED lights require compatible switches and drivers–a common oversight that leads to flickering or premature failure in Singaporean installations.
Installation Process for New LED Ceiling Light
Begin by connecting the wires according to your earlier documentation, using wire connectors or terminal blocks to secure live-to-live, neutral-to-neutral, and earth-to-earth connections. Singaporean electrical codes mandate proper insulation of all connections. Never rely on electrical tape alone. For driver-integrated LED fixtures, ensure adequate ventilation space as heat buildup significantly reduces lifespan in our tropical climate. Secure the fixture according to manufacturer instructions, taking special care with suspended ceilings common in condominiums. After physical installation but before replacing covers, restore power briefly to test functionality and immediately disconnect again if any issues arise.
We also provided detailed steps on how to replace ceiling light, including LED lighting types, in our “Complete Guide to Ceiling Lights in Singapore.”
Replacing Your Dimmable LED Ceiling Lights
Replacing dimmable LED ceiling lights requires special attention to compatibility and electrical safety. Unlike standard LEDs, dimmable fixtures rely on coordinated operation between the bulb, driver, and dimmer switch to function smoothly without flickering or premature failure. When selecting a replacement, verify that the new LED is explicitly labeled as “dimmable” and check its compatibility with your existing dimmer switch. Many older leading-edge (TRIAC) dimmers, common in Singaporean homes installed before 2015, often clash with modern trailing-edge (ELV) LED drivers, resulting in performance issues.
For optimal performance, consider upgrading to a universal dimmer switch certified under Singapore’s SS 145 standards, which can accommodate both LED types. During replacement, always isolate the circuit at the breaker and use a voltage tester to confirm power disconnection, as working on live dimming circuits poses significant shock risks. Post-installation, test the dimming range thoroughly. If the light flickers at low brightness or emits buzzing sounds, this typically indicates an incompatible driver-dimmer pairing that requires professional adjustment.
For complex installations, such as smart lighting systems or multi-fixture dimming setups common in Singaporean condominiums, consider professional installation. FixFirst can provide tailored solutions, from selecting compatible dimmable LEDs to rewiring circuits for seamless integration with your home’s lighting controls. Properly executed, a dimmable LED replacement enhances energy efficiency while maintaining the ambiance and functionality expected in modern Singaporean interiors.
Post-Installation Considerations
After successfully changing your LED ceiling light, conduct a thorough inspection. Check for any flickering (indicating loose connections) or unusual buzzing (suggesting transformer issues). Measure light distribution to ensure even illumination. Note that poorly positioned LEDs create shadows in Singapore’s typically compact living spaces. Consider pairing your new installation with smart controls or motion sensors for enhanced energy efficiency, a feature that’s becoming increasingly popular in eco-conscious Singaporean households.
When To Call a Professional
While many homeowners can manage basic LED ceiling light replacements, sometimes even to repair LED ceiling light fixtures, certain scenarios still require professional assistance. These include encountering aluminum wiring (common in older Singaporean homes), discovering water damage near the fixture especially in bathrooms, or dealing with complex multi-circuit ceiling light installations. FixFirst electricians can handle these challenges while ensuring full compliance with Singapore Standards SS 145 and building regulations.
Maintaining Your New LED Ceiling Light
Proper maintenance extends your LED light’s lifespan significantly. In Singapore’s humid environment, periodically check for moisture accumulation in enclosed fixtures. Clean dust from ventilation ports every 3 to 6 months using a dry microfiber cloth, and never with water or chemical cleaners. Monitor for early failure symptoms like color shifting or gradual dimming, which may indicate driver problems. With proper installation and care, quality LED ceiling lights typically last 5-7 years in Singapore’s operating conditions, providing superior energy efficiency compared to traditional lighting.
By following these guidelines on how to change LED ceiling light and how to replace ceiling LED light, Singaporean homeowners can achieve safe, effective lighting upgrades. For complex installations or uncertainty about any step, engaging professional electrical services ensures optimal results while maintaining the safety standards required in Singapore’s residential environments.