The moment you take down your television mount, a familiar sense of dread can set in. The wall, once a pristine canvas, now bears the evidence of your previous installation: a collection of unsightly holes, protruding plastic anchors, and perhaps even a few cracks. For residents in Singapore’s HDB flats and condominiums, this is a common domestic challenge. The question of how to fix holes in the wall from a TV mount is about restoring the integrity of your wall surface in a way that complies with local living standards and prepares your space for a new chapter. This comprehensive guide will walk you through every facet of the repair process, from understanding your wall’s composition to applying the final coat of paint, ensuring your wall looks as good as new.
Understanding the Anatomy of Your Wall and the Damage
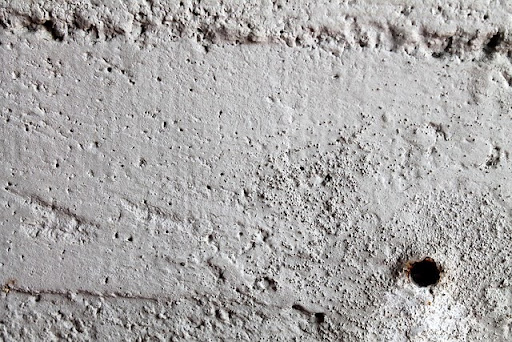
Before you reach for the spackle, you must first understand what you are working with. The walls in most Singaporean HDB flats are primarily constructed from brickwork or concrete blocks, finished with a layer of plaster and a final skim coat of paint. Modern partitions might use drywall or gypsum board. The type of wall dictates the repair approach. A TV mount, especially a heavy-duty full-motion bracket, inflicts specific damage. You are typically dealing with two primary types of imperfections: small screw holes filled with plastic wall plugs and, more problematically, larger cavities where the mounting keyhole or central lug may have been, sometimes causing the plaster to chip or crack. The plastic anchors themselves often prove stubborn to remove, sitting flush within the wall and demanding careful extraction to avoid enlarging the hole.
Navigating HDB Renovation Guidelines for Wall Works
In Singapore, any modification to your HDB flat comes with a set of responsibilities. The Housing & Development Board has clear guidelines for renovation works, which include drilling into walls. While the minor repair work of filling old screw holes falls under permissible cosmetic patching, it is crucial to understand the boundaries. The guidelines strictly regulate structural alterations and the drilling of reinforced concrete structural beams and columns. For your TV mount repair, this means you can proceed with confidence on non-structural partition walls. However, this is also a perfect moment to assess your initial installation. If you are planning to re-mount a TV, ensuring the new bracket anchors into a load-bearing wall and not a fragile partition is a critical safety measure that aligns with HDB’s commitment to structural integrity and resident safety.
Assembling Your Repair Toolkit: Essential Materials and Tools
A successful repair job hinges on having the right materials. A haphazard approach with incorrect fillers leads to subpar results that will disappoint over time. For the task of fixing TV mount holes, you will need a few specific items. A high-quality filler is important; for small screw holes, a ready-mixed interior wall filler or spackling paste suffices. For larger cavities, a two-part epoxy filler or a vinyl-reinforced patching compound provides greater durability and shrinkage resistance. Other essentials include a flexible putty knife in various sizes, a sanding block or sandpaper with multiple grits (from coarse to fine), a clean cloth, a dust brush, and primer. For paint, you must have the exact match of your wall’s existing colour; even a slight variance will be noticeable. A small can of the original paint, saved from your last renovation, is invaluable.
A Methodical, Step-by-Step Guide to a Flawless Wall Repair
Achieving an invisible repair requires patience and precision. Rushing any of these steps will result in a patch that draws the eye rather than disappearing into the wall.
| Step | Details |
|---|---|
| Step 1: Prepare the Work Area and the Holes | Begin by laying a drop cloth on the floor to catch dust and debris. Carefully remove any plastic wall plugs left in the holes. If they are protruding, use pliers to grip and twist them out. If they are flush, you may need to gently tap them into the wall cavity with a hammer and a nail set, or carefully pry them out with a screwdriver. Use a utility knife to neaten the edges of the holes, removing any loose plaster or paint chips. This creates a clean, stable cavity for the filler to adhere to. |
| Step 2: Apply the Filler Generously and Strategically | Take your chosen filler and load it onto your putty knife. Force the filler firmly into the holes, overfilling them slightly. You want to ensure the compound penetrates deeply and fills the entire cavity, leaving no air pockets. For larger holes, apply the filler in multiple thin layers, allowing each layer to dry completely before applying the next. This technique prevents excessive shrinkage and cracking. Scrape the excess filler off the wall, holding the knife at an angle to leave a smooth, slightly raised surface. |
| Step 3: Sand the Patched Areas to a Smooth Finish | Once the filler has dried completely and hardened (refer to the product’s instructions for drying times), you can begin sanding. Start with a coarser grit sandpaper to level the patch flush with the wall surface. Then, switch to a finer grit sandpaper to create a perfectly smooth, feathered edge that blends seamlessly with the surrounding wall. The goal is to run your hand over the patch and feel no discernible edge. Use a damp cloth to wipe away all the sanding dust; a clean surface is essential for the next steps. |
| Step 4: Prime the Repaired Sections | This is a step many DIY enthusiasts skip, but it is critical for a professional finish. Applying a primer sealer over the bare filler seals the porous surface, prevents the patch from absorbing paint differently than the surrounding wall, and ensures uniform colour and sheen. Use a small brush to apply a thin, even coat of primer directly over the sanded patches and allow it to dry thoroughly. |
| Step 5: Paint with Precision and Blend the Finish | Once the primer is dry, you can apply your matched paint. Stir the paint thoroughly. Using a small, high-quality brush or a mini-roller, carefully apply the first coat over the primed patches. Feather your brush strokes outward to blend with the existing wall paint. Depending on the paint’s coverage, you may need a second coat. For the best possible blend on a prominent wall, some experts recommend painting a thin coat over the entire wall section from corner to corner, as painting just a small spot can leave a visible “flash” or difference in sheen. |
Need help covering up drill holes in your HDB wall? FixFirst’s certified handymen provide fast, professional patching and repainting services
Knowing Your Limits: When To Call a Professional Handyman
While the DIY path is rewarding, there are clear scenarios where engaging a professional handyman service like FixFirst is the most prudent and effective choice. If the removal of the TV mount has caused significant damage, such as large chunks of plaster falling away or deep, wide cracks radiating from the holes, the repair is beyond basic patching. If you lack the time, tools, or confidence to achieve a seamless finish, a professional can guarantee a perfect, invisible repair. Furthermore, if you are preparing your home for sale or rental, or if the wall in question is highly visible, the investment in a professional service ensures the job is done right the first time.

Proactive Measures and Future-Proofing Your Walls
The best repair is the one you can avoid altogether. When installing a new TV mount, consider using a mounting template with precision to minimize drilling errors. For renters or those who frequently update their layout, exploring heavy-duty adhesive mounting options designed for modern, lighter televisions could be a viable, non-invasive alternative. If you must drill, mark your drill points with a pencil and use a level religiously. Taking these proactive steps during installation can save you considerable time and effort when the time comes to remove the bracket, leaving you with minimal damage to address.
The process of restoring your wall after removing a TV mount is a satisfying endeavor that reclaims the cleanliness and order of your living space. Whether you undertake the task yourself with careful attention to detail or decide to entrust it to a skilled professional, the result is a smooth, unblemished wall ready for a fresh start. Do not let the remnants of old installations compromise the aesthetic harmony of your Singapore home. If the task seems daunting or you desire a guaranteed flawless finish, remember that expert help is readily available. Contact FixFirst today for a professional, efficient handyman solution that will make those holes a distant memory, leaving you with nothing but a perfectly restored wall.