For Singaporean HDB homeowners, choosing the right air-conditioning system is both a matter of comfort and a major investment in the quality of your home life. Among the many brands available, Mitsubishi Electric stands as a hallmark of reliability, energy efficiency, and quiet operation, making their wall mounted air conditioning unit the most popular in Singapore. The journey from selection to enjoying a cool breeze involves crucial steps: understanding HDB regulations, executing a secure installation, and committing to proper maintenance. This guide dives deep into every facet of owning a Mitsubishi wall mounted air conditioner in the Singapore context. We will explore the specifics of different models, from the modern Mitsubishi inverter wall mount unit to legacy systems, demystify the installation process, and provide you with the knowledge to troubleshoot common issues. Our goal is to empower you with information, ensuring your cooling system delivers peak performance for years, while keeping your home and compliance in perfect order.
What’s in this guide:
- Navigating HDB Regulations for Aircon Installation
- Choosing the Right Mitsubishi Wall Mounted Model for Your HDB Flat
- The Step-by-Step Process of a Professional Wall Mounted Aircon Installation
- Why Choose a FixFirst Technician To Install Your Wall-Mounted Mitsubishi Aircon
- Mastering Maintenance and Preventing Common Repairs
- Decoding Mitsubishi Error Codes: A Troubleshooting Guide
- Frequently Asked Questions (FAQs)
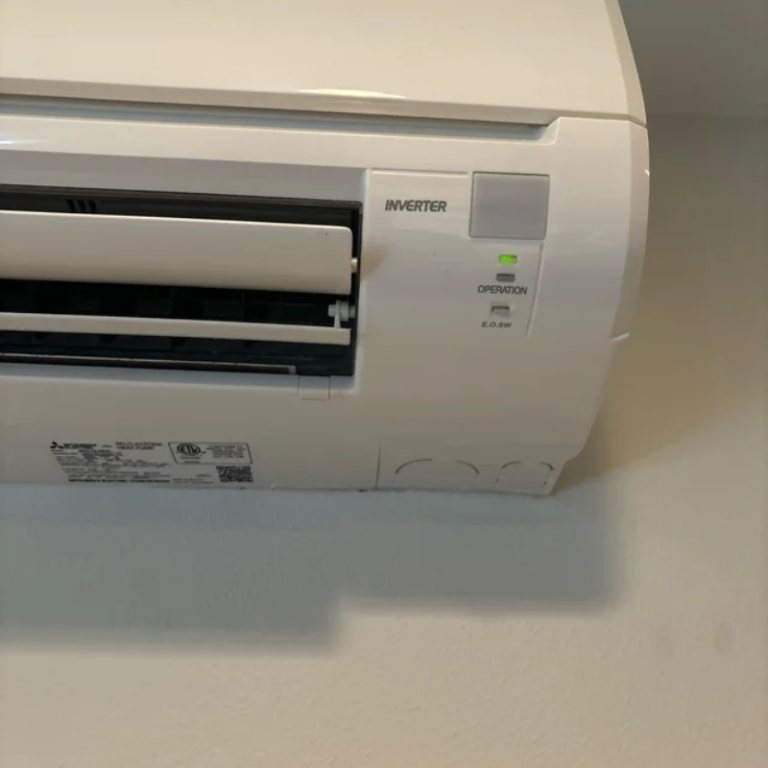
Navigating HDB Regulations for Aircon Installation
Before any installation work begins, familiarizing yourself with Housing & Development Board (HDB) guidelines is an absolute necessity. These rules exist to ensure the structural integrity of the building and the safety of all residents. For most HDB blocks completed on or after 1 January 1994, or those that have undergone the Main Upgrading Programme (MUP) or Home Improvement Programme (HIP), the electrical loading has been upgraded. You typically do not need to apply for a separate permit from HDB to install an air-conditioner in these flats. However, the responsibility for a proper and safe installation rests entirely with the homeowner.
Critically, HDB mandates that you must engage installers who have been certified by the Building and Construction Authority (BCA). This is a requirement for ensuring that installers possess the necessary skills to handle refrigeration gases, electrical connections, and secure mounting—all vital for safety. The air-conditioner units, particularly the outdoor condensing unit for a split-type system, must be placed at approved locations using methods that HDB endorses. An improper installation can lead to water leakage affecting neighbors, noise complaints, or even the dangerous risk of a unit becoming dislodged. Therefore, verifying your installer’s BCA certification is the first and most critical step in your project.
Choosing the Right Mitsubishi Wall Mounted Model for Your HDB Flat
Mitsubishi Electric offers a diverse range of wall mounted air conditioners, each designed to meet different needs and budgets. Understanding the key differences will help you select a model that aligns with your room size, usage patterns, and long-term efficiency goals.
The most significant distinction lies between inverter and non-inverter technology. A Mitsubishi inverter wall mount unit, such as the renowned Starmex MSY-GE and MSXY-FJ series, represents the current standard for energy efficiency. These units adjust their compressor speed dynamically to maintain a set temperature, avoiding the power-intensive stop-start cycles of older models. The result is substantial electricity savings, quieter operation, and more consistent cooling. For most HDB homeowners, this is the recommended choice. Conversely, you might encounter older models like the Mitsubishi r22 wall mount Starmex non-inverter. These units, which use the now-phased-out R22 refrigerant, operate at a fixed speed and are generally less efficient. While they may have a lower initial wall mounted air conditioner price, their higher running costs and environmental impact make them a less attractive option for new installations.
For specific needs, Mitsubishi also offers specialized designs. The Mitsubishi Starmex EF series wall mounted type is engineered for commercial or high-usage environments, boasting enhanced durability. While less common in standard HDB bedrooms, a wall mounted cassette air conditioner can be an elegant solution for larger living rooms where a central, flush-mounted unit with multi-directional airflow is desired. When selecting any wall mounted air conditioning unit, always match the BTU (British Thermal Unit) cooling capacity to your room’s size. An undersized unit will struggle, while an oversized one will cycle too frequently, reducing efficiency and comfort.
A Guide to Key Mitsubishi Wall Mounted Models
| Model Type/Category | Key Characteristics & Best Application |
|---|---|
| Modern Inverter (e.g., Starmex MSY-GE) | High energy efficiency, variable speed compressor, lower long-term costs. Ideal for all HDB bedrooms and living rooms. |
| Legacy Non-Inverter (e.g., Mitsubishi r22 wall mount Starmex) | Fixed-speed compressor, uses R22 refrigerant (phased out), higher energy consumption. Consider only for replacement in existing systems. |
| Commercial/Heavy-Duty (EF Series) | Built for extended operation, often found in offices. Suitable for HDB living rooms with very high usage patterns. |
| Cassette Type | Flush ceiling installation, 360-degree airflow. Perfect for large, open-plan HDB living/dining areas where wall space is limited. |
The Step-by-Step Process of a Professional Wall Mounted Aircon Installation
A professional wall mounted air conditioner installation is a meticulous process that goes far beyond simply screwing a unit to the wall. For a Mitsubishi wall mounted air conditioner, proper installation is the single greatest factor determining its efficiency, lifespan, and reliability. Here is how certified technicians, like those from FixFirst, execute a standard Mitsubishi fcu installation wall mounted:
| Step | Details |
|---|---|
| Step 1: Site Survey and Planning | A technician first visits your home to assess the room layout, window positions, and the intended location for the outdoor condensing unit. They measure the room to confirm cooling capacity needs, identify the best indoor unit placement for even airflow, and plan the most direct and aesthetically pleasing route for the refrigerant pipes, drainage hose, and electrical wiring. |
| Step 2: Mounting the Indoor Bracket | The technician securely mounts the heavy-duty metal bracket for the indoor unit on a load-bearing wall. They use a spirit level to ensure it is perfectly horizontal, as a tilted bracket can cause improper drainage and water leakage. |
| Step 3: Drilling the Service Hole | A single, clean hole is drilled through the wall at a slight downward angle (from indoor to outdoor) to accommodate the connection pipes and drainage hose. This angle is crucial to ensure condensation water flows outward freely. |
| Step 4: Installing the Piping and Drainage | Copper refrigerant pipes are carefully uncoiled, cut to length, and insulated. The drainage hose is connected and also insulated to prevent condensation “sweating.” These are then fed through the service hole to the outdoor unit location. |
| Step 5: Mounting the Outdoor Unit | The condensing unit is placed on a sturdy, level platform or brackets at the approved HDB location. It must be securely fixed to withstand wind and vibration, with adequate clearance around it for airflow and future maintenance access. |
| Step 6: Electrical and Flaring Connections | Certified technicians make the electrical connections at both the indoor and outdoor units. They perform precision flaring on the copper pipes to create perfect seals before connecting them to the units. |
| Step 7: Vacuuming and Gas Charging | The system is connected to a vacuum pump to remove all air and moisture from the refrigerant lines, a critical step often skipped in rushed jobs. The correct amount of refrigerant is then charged into the system according to the pipe length and model specifications. |
| Step 8: Testing and Commissioning | The technician powers on the system, tests all modes (cooling, fan, dry), checks for correct drainage, verifies remote control operation, and listens for any abnormal noises. They also explain basic operation and maintenance to the homeowner. |
Need a new Mitsubishi aircon installed in your HDB flat? FixFirst ensures full HDB compliance, precision workmanship, and warranty-safe procedures. From site survey to final testing, we guarantee a cool, quiet, and reliable setup—done right the first time.
Skipping or compromising on any of these steps, especially proper vacuuming or secure mounting, is a direct invitation to future problems like gas leaks, water dripping, or reduced cooling power.
Why Choose a FixFirst Technician To Install Your Wall-Mounted Mitsubishi Aircon
Selecting the right installer is as important as choosing the aircon itself. FixFirst stands out as the definitive choice for your Mitsubishi wall mounted air conditioner project for compelling reasons:
✔️ BCA-Certified Expertise: Our technicians are fully trained and certified by the Building and Construction Authority, ensuring full compliance with all HDB safety and installation standards. We handle the technical complexities so you don’t have to worry.
✔️ Mitsubishi-Specific Knowledge: We possess deep, model-specific knowledge of Mitsubishi systems, from the latest Mitsubishi inverter wall mount unit to older Mitsubishi r22 mr slim wall mount systems. This expertise guarantees that your unit is installed to manufacturer specifications for optimal performance.
✔️ Commitment to Correct Procedures: We never cut corners. Our rigorous process includes mandatory system vacuuming, precision flaring, and comprehensive testing. This approach prevents common post-installation issues, protecting your investment from day one.
✔️ Clear, Upfront Pricing: We provide detailed, transparent quotations for your wall mounted air conditioner installation with no hidden costs. You will know exactly what you are paying for, from the wall mounted air conditioner price of the unit to the labor and materials.
✔️ Holistic Home Service Partner: Beyond aircon, FixFirst offers integrated electrical and plumbing services. If your installation requires new power points or drainage adjustments, we can manage the entire project seamlessly, ensuring all work is safe, tidy, and coordinated.
Mastering Maintenance and Preventing Common Repairs
Regular maintenance is the key to preserving the efficiency, cooling power, and longevity of your wall mounted air conditioning unit. A well-maintained system uses less energy, prevents sudden breakdowns during Singapore’s hottest days, and maintains better indoor air quality.
The cornerstone of maintenance is regular cleaning of the filters and indoor unit. For any Mitsubishi wall mounted air conditioner, the filters behind the front panel trap dust and particles. Clogged filters restrict airflow, forcing the unit to work harder, which increases power consumption and reduces cooling. Homeowners should clean these washable filters with water every two weeks. Annual professional servicing is equally critical. A FixFirst technician will perform a deep clean of the indoor coil and blower wheel, clear the drainage tray and pipe to prevent algae clogs that cause water to leak, check refrigerant pressure, tighten electrical connections, and clean the outdoor unit’s condenser coil, which accumulates dirt and leaves.
Neglecting maintenance leads directly to common repairs. The most frequent issues include weak cooling (often due to dirty filters or coils, or low refrigerant from a leak), water dripping indoors (a sign of a blocked drainpipe), unusual noises (from loose parts or a dirty fan), or the unit not turning on (which could stem from a remote control, capacitor, or PCB issue). A Mitsubishi wall mounted ac problem auto on off could indicate a faulty temperature sensor or a wiring issue that requires professional diagnosis. Addressing small problems promptly through maintenance can help you avoid major, costly repairs down the line. For added protection, consider a wall mounted air conditioner cover for the outdoor unit during prolonged periods of non-use or heavy construction nearby, but never cover the indoor unit while it is operating.
Decoding Mitsubishi Error Codes: A Troubleshooting Guide
When your Mitsubishi aircon displays an error code on its remote or indoor unit LED, it is communicating a specific issue. Understanding these codes can help you determine if a simple reset will work or if you need to call a professional. Here is a thorough guide to common Mitsubishi Starmex error codes, their meanings, and initial actions.
E0, E1, E2, E3, E4, E5, E6, E7 (Protection Operation Codes): These codes often indicate a safety device has been triggered. For example, E6 typically points to a malfunction in the indoor unit’s fan motor or its sensor. E1 often relates to the outdoor unit’s PCB. Troubleshooting Tip: Turn the system off at the main power isolator switch for 5-10 minutes, then restart. If the code persists, professional service is needed.
H1, H2, H3 (Motor-Related Codes): H1 is a common code signaling a defrosting operation in the outdoor unit during cold weather. This is normal and should clear on its own. H2 often indicates an issue with the position sensor of the indoor fan’s swing louvers. Troubleshooting Tip: For H1, wait 10-15 minutes. For H2 or H3, check if the louvers are physically obstructed.
P0, P1, P2, P3, P4, P8, P9 (Refrigerant/Electrical System Codes): These are critical codes often related to refrigerant pressure or major electrical components. P1 indicates abnormally high refrigerant pressure, while P0 indicates low pressure, potentially from a leak or clog. P8 often relates to a sensor issue on the outdoor unit’s heatsink. Troubleshooting Tip: Do not attempt to fix these. Immediately turn off the unit and contact a certified technician like FixFirst. These issues involve high pressure and specialized tools.
F0, F1, F2, F3, F4 (Sensor Failure Codes): These codes denote failures in various temperature sensors (room, indoor coil, outdoor coil, etc.). A faulty sensor sends incorrect data to the control system. Troubleshooting Tip: A reset may temporarily clear it, but the code will likely return. The faulty sensor requires replacement by a technician.
📌Important Note: This listing is for guidance. Always refer to your specific model’s manual for the most accurate code definitions. For any persistent code, especially those related to refrigerant (P-series) or electrical faults, professional intervention is essential for safety and correct repair.

Frequently Asked Questions (FAQs)
The total wall mounted air conditioner price depends on the model’s capacity (BTU), series, and installation complexity. A basic 9,000 BTU Mitsubishi Starmex inverter system might start from around S$1,000 inclusive of standard installation, while higher-capacity or premium models can cost more. Always get a detailed quote that separates the unit cost from installation labor and materials.
You must follow strict HDB guidelines. Generally, condensing units can be installed on reinforced concrete structural ledges or at designated rack-up areas provided by HDB. Installation on non-structural ledges, asbestos ledges, or areas that obstruct common corridors is prohibited. A professional installer will advise on the approved location for your specific block.
A Mitsubishi inverter wall mount unit varies its compressor speed to precisely maintain temperature, offering significant energy savings (up to 30-40% more efficient), quieter operation, and more stable cooling. A non-inverter model, like an older Mitsubishi r22 wall mount Starmex non-inverter, runs at full power until the temperature is reached, then shuts off, leading to more temperature fluctuation and higher electricity consumption.
For optimal performance in Singapore’s climate, schedule a professional chemical wash or overhaul at least once a year. Homeowners should clean the air filters every two weeks. If the unit is used heavily, consider servicing every 6-8 months.
This is usually caused by a blocked drainage pipe. First, turn off the unit to prevent more water buildup. You can try gently cleaning the visible end of the drainpipe. However, the clog is often deeper within the system and requires a technician to use specialized tools to clear it completely.
For codes like P1 (high pressure) or other P-series codes, turn off the unit immediately and call a technician. For E6 (indoor fan motor), you can try a system reset by turning the power off at the isolator for 10 minutes. If it returns, professional service is needed to check the motor or sensor.
This depends on the repair cost and the unit’s age. Since R22 refrigerant is phased out and cannot be refilled (only recycled stock exists, making it expensive), major repairs involving gas leaks may not be economical. It is often more cost-effective in the long run to upgrade to a modern, energy-efficient inverter model.
Selecting and installing a Mitsubishi wall mounted air conditioner in your HDB flat is a decision that influences your daily comfort and household expenses for a decade or more. From understanding HDB’s essential safety rules and selecting the right model—be it a modern Mitsubishi inverter wall mount unit or addressing a legacy system—to ensuring a flawless installation and committed maintenance, every step matters. By choosing a certified, experienced partner like FixFirst, you gain a reliable service provider as well as peace of mind. Our technicians bring the precision, knowledge, and integrity needed to transform your investment into lasting, reliable comfort.
See the difference of a professionally installed Mitsubishi aircon. Contact FixFirst today for a transparent, no-obligation consultation and quotation. Let our experts handle your wall mounted air conditioner installation with the care and professionalism your home deserves.