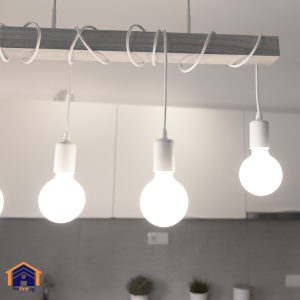
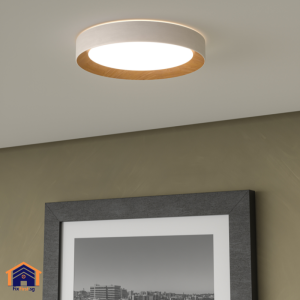
As energy efficiency becomes a priority for homeowners and businesses, many are making the switch from traditional fluorescent lighting to modern LED alternatives. Circular fluorescent lights, commonly found in kitchens, bathrooms, and commercial spaces, are being phased out due to their higher energy consumption, shorter lifespan, and inferior light quality compared to LEDs. If you’re wondering how to replace a circular fluorescent light with LED, the process is straightforward and offers long-term benefits in cost savings and performance.

Why Replace Fluorescent with LED?
Fluorescent lights have been a standard lighting solution for decades, but they come with several drawbacks. They contain mercury, making bulb disposal an environmental concern, and they often flicker or hum as they age. Additionally, fluorescent tubes degrade over time, producing less light while consuming the same amount of electricity. LED lighting, on the other hand, is far more energy-efficient, lasting up to 50,000 hours, which is significantly longer than fluorescent bulbs. LEDs also provide instant brightness without flickering, offer better color rendering, and are mercury-free. By learning how to replace a circular fluorescent light with LED, you can reduce energy bills, minimize maintenance, and enjoy superior illumination.
Choosing the Right LED Replacement
Before beginning the replacement process, you’ll need to select an appropriate LED alternative. There are two primary options: LED retrofit kits and dedicated LED circular fixtures.
A retrofit kit allows you to keep the existing fixture while replacing only the ballast and tubes. These kits typically include an LED driver and a compatible circular LED bulb designed to fit into the old fluorescent housing. This option is cost-effective and requires minimal modifications.
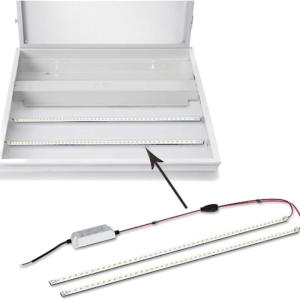
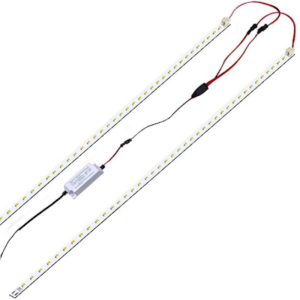
Alternatively, you can install a brand-new LED circular fixture, which eliminates the need for a ballast altogether. This method provides a cleaner, more modern look and ensures optimal performance since the fixture is designed specifically for LED technology. Brands like Philips, GE, and Cree offer high-quality circular LED fixtures in various sizes and color temperatures.
Step-by-Step Replacement Process
Replacing a circular fluorescent light with an LED involves a few key steps. First, ensure the power is turned off at the circuit breaker to prevent electrical hazards. Remove the existing fluorescent bulb by gently twisting it counterclockwise and sliding it out of the fixture.
Next, if you’re using a retrofit kit, disconnect and bypass the old ballast. Since LEDs operate on low-voltage direct current (DC), the fluorescent ballast is unnecessary and must be removed or rewired according to the LED kit’s instructions. Connect the wires from the fixture directly to the LED driver, ensuring secure connections with wire nuts.
If you’re installing a completely new LED fixture, detach the old fluorescent housing from the ceiling or wall. Follow the manufacturer’s guidelines for mounting the new LED fixture, which usually involves securing it with screws and connecting the wiring to your home’s electrical supply. Once installed, attach the LED bulb (if applicable) and restore power to test the light.
Troubleshooting and Final Adjustments
After installation, verify that the LED light functions correctly. If it doesn’t turn on, double-check the wiring connections and ensure the circuit breaker is active. Some LED fixtures may also have a built-in dimming feature, which requires compatibility with your existing dimmer switch.
With the new LED light in place, you’ll immediately notice the improved brightness and energy efficiency. Unlike fluorescent lights, LEDs reach full brightness instantly and maintain consistent light quality throughout their lifespan.
Conclusion
Understanding how to replace a circular fluorescent light with LED empowers you to upgrade your lighting system efficiently and sustainably. Whether you choose a retrofit kit or a new fixture, the transition is a worthwhile investment that enhances both functionality and energy savings.

Frequently Asked Questions (FAQs) on Replacing Fluorescent Lighting with LED
Yes, existing fluorescent lighting can be replaced with LED tubes or panels. There are two primary methods:
- LED Tube Retrofit: Compatible LED tubes (ballast-compatible or ballast-bypass) can directly replace fluorescent tubes without modifying the fixture.
- Complete Fixture Replacement: Swapping out the entire fluorescent fixture for a dedicated LED panel or troffer provides better efficiency and longevity.
Switching from fluorescent to LED involves these steps:
- Turn off power at the circuit breaker for safety.
- Remove the fluorescent tubes by rotating them 90 degrees and sliding them out.
- Check the ballast. If using ballast-compatible LED tubes, the existing ballast can remain.
But if using ballast-bypass LED tubes, the ballast must be removed, and the fixture rewired for direct line voltage.
- Install the LED tubes by aligning the pins and rotating them into place.
- Restore power and test the lights.
For best results, consult an electrician if unsure about wiring modifications.
Retrofitting fluorescent lights to LED can be done in two ways:
- Option 1: Plug-and-Play (Ballast-Compatible) LED Tubes. Simply remove the fluorescent tubes and install LED tubes that work with the existing ballast. No rewiring needed, but efficiency depends on the ballast’s condition.
- Option 2: Direct-Wire (Ballast-Bypass) LED Tubes. Disconnect power and remove the fluorescent tubes. Remove or bypass the ballast (since LED tubes run on direct line voltage). Rewire the fixture to supply power directly to the sockets. Install the LED tubes and restore power.
Ballast-bypass retrofitting is more energy-efficient but requires electrical expertise.
Circular fluorescent lights (e.g., PL lamps) can be replaced with LED alternatives in two ways:
- LED Retrofit Lamps: Some LED PL lamps are designed to fit into existing circular fluorescent fixtures without rewiring.
- Complete Fixture Replacement: For optimal performance, replace the entire fixture with an integrated LED round panel or downlight.
To retrofit, turn off power first and then remove the circular fluorescent bulb by gently twisting it out. Install the compatible LED bulb or replace the fixture entirely.
Wiring LED tubes in a former fluorescent fixture depends on the type of LED tube:
- Ballast-Compatible LED Tubes. No rewiring needed, just replace the tubes.
- Ballast-Bypass LED Tubes. Disconnect from the power source. Remove the ballast and disconnect its wires. Connect live (L) and neutral (N) wires directly to the tombstone (socket) terminals.
✔️Single-end powered tubes: Only one side receives power.
✔️Double-end powered tubes: Both ends receive power.
Secure connections with wire nuts and insulate properly. Install LED tubes and restore power.
⚠️ Safety Note: If unsure about wiring, hire a licensed electrician.
To replace a circular fluorescent fixture with LED:
- Turn off power at the breaker.
- Remove the old fixture by unscrewing the mounting screws and disconnecting wires.
- Install the new LED fixture. Match the mounting points or use an adapter if needed. Then connect the wires (Live to Live, Neutral to Neutral, Ground to Ground).
- Secure the fixture and restore power.
Alternatively, use an LED retrofit kit designed for circular fluorescent fixtures if you prefer not to replace the entire housing.
For professional assistance with LED lighting installations in Singapore, choose FixFirst. Contact us over Whatsapp to ensure a seamless and safe upgrade tailored precisely to your needs.