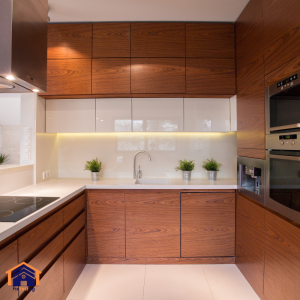
Wall-mounted lights offer a great way to layer illumination in Singapore homes. Unlike ceiling fixtures that cast light from above or table lamps that consume surface space, wall-mounted lights provide targeted lighting at human height, creating warmth, definition, and functionality in any room. Philips, a brand known for reliability and consistent quality, offers a range of wall-mounted fixtures suited to HDB flats. Getting the installation right requires understanding electrical safety, placement principles, and the specific requirements of your wall type.

Selecting Philips Wall Mounted Lights for Your Space
Choosing the right fixture involves more than aesthetics. You need to match the light’s purpose, beam direction, and brightness to the room’s function.
Consider where you need light. Bedrooms benefit from Philips wall mounted lights positioned on either side of the bed as reading lamps. These fixtures typically feature adjustable arms or swivel heads, allowing you to direct light exactly where you need it while keeping nightstands clear. Living rooms suit up-down lights that cast light both upward for ambient illumination and downward for task lighting or accenting artwork. Hallways and stairwells require fixtures with wide beam angles to illuminate the entire passage safely.
The type of light source matters. Philips offers LED wall lights that consume a fraction of the electricity of older halogen or fluorescent models. LED fixtures also run cooler, an important consideration when mounting on walls that may have insulation or when installing in children’s rooms. Look for fixtures with replaceable LED modules rather than integrated LEDs that require full fixture replacement if the light source fails.
Colour temperature affects the mood of your space. Warm white light at 2700K to 3000K creates a relaxing atmosphere suitable for bedrooms and living areas. Cool white light at 4000K to 5000K works better in bathrooms, kitchens, and study areas where task visibility matters. Many Philips wall mounted lights now offer selectable colour temperature switches, allowing you to choose the tone during installation rather than being locked into a single option.
Pre-Installation Electrical Considerations
Wall-mounted lights require electrical supply. Before purchasing any fixture, assess what wiring exists at your intended mounting location.
HDB flats typically have electrical points installed in walls according to the original floor plan. If you plan to mount a light where no existing switch or socket exists, you will need to run new wiring from an existing electrical point or from the main distribution board. This work falls under the category of electrical installation and must comply with Singapore Standards and the Energy Market Authority’s regulations.
Only licensed electricians can perform new wiring installations in HDB flats. Homeowners cannot legally run new electrical cables or create new lighting points without engaging a licensed electrical worker. This is not a DIY task. Attempting to tap into existing circuits incorrectly can lead to overloaded wiring, tripping breakers, or fire hazards.
If your chosen location already has a wall light fixture or a covered electrical junction box, replacing the fixture is straightforward. You simply remove the old fixture and install the new Philips wall mounted lights using the existing wiring and switch. This type of replacement does not require a licensed electrician, though you must ensure the circuit is switched off at the distribution board before handling any wiring.
Positioning Your Wall-Mounted Lights
Placement determines how effectively your wall-mounted lights perform their intended function. Consider both ergonomics and visual balance.
For bedside reading lights, mount the fixtures approximately 600mm to 800mm above the mattress surface. This height places the light source slightly above eye level when sitting up in bed, reducing glare while providing adequate illumination across the page or screen. Position the lights on both sides of the bed, aligned with the edges of the mattress rather than centred behind the headboard.
For living room accent lighting, consider mounting up-down lights at a height of 1800mm to 2000mm from the floor. This elevation allows the upward light to wash across the ceiling while the downward light illuminates artwork or architectural features below. Space multiple fixtures evenly along the wall, typically 1800mm to 2400mm apart depending on the beam spread of each unit.
Hallways and corridors require careful spacing to avoid dark spots. Mount wall lights at 1800mm to 2000mm from the floor, positioning them so the beam overlaps slightly between fixtures. For a typical HDB corridor of 6 metres in length, two to three wall lights spaced evenly provide consistent illumination without glare at eye level.
Avoid mounting lights too close to door frames or corners. Allow at least 300mm of clearance from any adjacent opening to ensure the light beam does not get obstructed when doors swing open. Also avoid mounting directly opposite mirrors unless you intend to create a vanity lighting setup, as this can produce uncomfortable glare.
Understanding Wall Types and Mounting Methods
The method of mounting your Philips wall mounted lights depends entirely on the wall composition behind the fixture.
Concrete load-bearing walls provide the most secure mounting surface. You will need a hammer drill with a carbide-tipped masonry bit to create holes for wall plugs. Use expansion anchors rated for the weight of the fixture since most Philips wall lights weigh under 2kg, so standard 6mm masonry anchors suffice. Drill holes exactly where the fixture’s mounting bracket aligns, staying within HDB regulations of 6mm diameter and 40mm penetration depth.
Brick walls require similar masonry drilling techniques. However, brick can be softer than concrete, so take care not to over-drill or use excessive hammer action, which can widen the hole and reduce anchor grip. Use a standard drill with masonry bit first, switching to hammer action only if the bit does not penetrate easily.
Ferrolite partition walls demand special attention. These lightweight walls have a thin concrete layer over a foam core. You must not drill within 200mm vertically below ceilings or beams. Use purpose-made Ferrolite anchors designed to grip without over-penetrating. The drill depth must not exceed 22mm to avoid damaging the internal steel plate. Many electricians prefer to use chemical anchors or toggle bolts for Ferrolite installations to ensure long-term security.
For drywall or gypsum board partitions, standard wall plugs will fail. Use hollow wall anchors such as spring toggles or self-drilling anchors rated for the fixture’s weight. Ensure the anchor expands fully behind the board to distribute the load.
Tools and Materials Required
Having the correct tools on hand ensures a smooth installation without unnecessary trips to the hardware store.
Essential tools include a hammer drill for masonry walls or a standard drill for other wall types, a wire detector to locate concealed wiring and pipes, a voltage tester to confirm circuits are de-energised, a spirit level, a measuring tape, a pencil, and a set of screwdrivers. You will also need wire strippers and electrical tape if you are connecting the fixture to existing wiring.
Fasteners must match your wall type. For concrete and brick, use 6mm masonry anchors with matching screws. For Ferrolite, use Ferrolite-specific anchors. For drywall, use toggle bolts or self-drilling plasterboard anchors. Do not use the plastic wall plugs that sometimes come with generic fixtures unless you have verified they suit your wall type.
If you are replacing an existing fixture, have a voltage tester to confirm the circuit is dead before touching any wires. Also keep a small container or magnetic tray to hold screws and small parts during the installation.
Step-by-Step Installation Guide
Follow these steps carefully when installing Philips wall mounted lights. If you are creating a new electrical point rather than replacing an existing fixture, stop after step one and engage a licensed electrician to run the wiring.
| Step | Details |
|---|---|
| Step 1: Confirm the electrical supply | Switch off the circuit breaker controlling the light circuit at your distribution board. Use a voltage tester to confirm no power is present at the existing wiring point. If no wiring exists at your intended location, call a licensed electrician to install a new electrical point before proceeding. |
| Step 2: Remove any existing fixture | If replacing an old light, unscrew the fixture from its mounting bracket and disconnect the wires. Take note of how the wires connect—live (brown or red), neutral (blue or black), and earth (green-yellow or bare copper). Keep the mounting bracket if it matches the spacing of your new Philips wall mounted lights. |
| Step 3: Mark mounting holes | Hold the new fixture’s mounting bracket against the wall at your desired height. Use a spirit level to ensure the bracket sits perfectly horizontal. Mark the screw hole positions with a pencil. Double-check that the bracket will cover the existing electrical junction box or that the box sits within the fixture’s footprint. |
| Step 4: Drill holes and install anchors | Using the appropriate drill bit for your wall type, drill holes at your marked positions. For concrete and brick, use a hammer drill and insert masonry anchors. For Ferrolite or drywall, insert the specialised anchors according to their instructions. Wipe away any dust before proceeding. |
| Step 5: Mount the bracket | Secure the mounting bracket to the wall using the screws provided or screws matched to your anchors. Tighten firmly but avoid overtightening, which can strip the anchors or damage the wall. Verify the bracket remains level. |
| Step 6: Connect the wiring | If you are replacing an existing fixture, connect the wires from your wall to the fixture’s terminal block. Match live to live, neutral to neutral, and earth to earth. Ensure all connections are tight and no bare wire remains exposed. If the fixture has a grounding terminal, connect the earth wire. If your home’s wiring does not include an earth wire, consult an electrician before proceeding. |
| Step 7: Secure the fixture | Carefully position the Philips wall mounted lights onto the mounted bracket. Most Philips fixtures attach with a locking mechanism or set screws. Follow the manufacturer’s instructions to lock the fixture in place. Ensure the fixture sits flush against the wall with no gaps. |
| Step 8: Install lamps and test | If the fixture uses replaceable bulbs, insert the correct type and wattage as specified by Philips. Switch the circuit breaker back on and turn on the light switch. Test the fixture to ensure it illuminates correctly. Check for any flickering, unusual sounds, or loose connections. |
Need help installing wall lights safely? FixFirst’s EMA-licensed electricians provide professional lighting installations across all HDB flats in Singapore. From wiring checks to final testing, we ensure every fixture is secure, grounded, and beautifully lit. Book now for a safe, hassle-free upgrade!
Common Installation Mistakes
Avoiding common errors saves time and prevents safety hazards.
Connecting wires with the circuit still live is dangerous. Always switch off at the distribution board and test for voltage before touching any wiring. Even with the switch off, power may still be present at the fixture if the switch is wired on the neutral side.
Mounting fixtures without verifying the wall type leads to loose installations. A fixture that seems secure immediately after installation may loosen over weeks or months as the incorrect anchors fail. Match the fastener to the wall.
Ignoring the fixture’s weight rating for the mounting surface causes problems. A heavy fixture on drywall requires toggle bolts, not plastic wall plugs. A lightweight fixture on concrete requires only basic masonry anchors. Over-fastening or under-fastening both create risks.
Positioning fixtures without considering the beam angle results in poor lighting. A narrow-beam light mounted too high will create a spotlight effect rather than ambient illumination. A wide-beam light mounted too low will cast glare. Read the fixture specifications and test placement by holding the fixture at various heights before drilling.
Conclusion
Philips wall mounted lights combine reliable performance with clean aesthetics, making them a popular choice for Singapore HDB flats. Selecting the right fixture for each room, positioning it at appropriate heights, and mounting it securely on the correct wall type all contribute to a successful installation. When replacing an existing light, a careful DIY approach works well. When new wiring is required, engaging a licensed electrician ensures safety and compliance with regulations.
FixFirst connects you with licensed electricians and experienced handymen who understand HDB requirements and carry the correct tools for every wall type. Whether you need a new electrical point installed or a fixture mounted securely on Ferrolite walls, our professionals complete the work safely and cleanly. Contact FixFirst today to schedule your lighting installation and transform your home’s illumination.