Singapore’s tropical climate makes a good fan essential in every home. But a floor fan standing in the middle of your living room takes up valuable space, creates a tripping hazard, and often gets knocked over by children or pets. Mounting that same fan on the wall solves all these problems. Wall-mounted fans provide dedicated air circulation to specific areas like living rooms, bedrooms, and common corridors without consuming valuable floor space. Learning how to mount a floor fan on the wall transforms your cooling setup while reclaiming square metres in your HDB flat.

Understanding Your Fan's Mounting Compatibility
Before you attempt how to mount a floor fan on the wall, check whether your specific fan model supports wall mounting. Not every floor fan can hang on a wall. Some models require a conversion kit to adapt them for wall mounting. Others come with dedicated wall brackets designed specifically for that model.
Universal wall mount brackets exist for many standard floor fans. These brackets typically consist of solid steel construction and attach to the wall using heavy-duty screws. Some brackets clamp around the fan’s base or pole, while others provide a platform that holds the fan securely. Before you buy any bracket, verify its weight capacity against your fan’s weight. A fan that falls off the wall due to an undersized bracket poses a serious safety risk.
Essential Tools and Materials
Gathering the right tools beforehand saves time and frustration. You will need your wall fan with its mounting bracket, an electric drill with appropriate drill bits, wall plugs and screws suited to your wall type, a measuring tape, a pencil for marking positions, a spirit level, a ladder, safety goggles, and gloves. A stud finder with AC detection proves invaluable for locating wall studs and concealed wiring.
Choosing the Right Location
The location of your wall-mounted fan determines how effectively it cools your room. The ideal height for a wall-mounted fan is between 1.8 and 2 metres from the floor. This height positions the fan above head level, allowing air to circulate throughout the room while keeping the blades safely out of reach. Ensure the fan is not too close to curtains, furniture, or other obstructions that can block airflow. Position the fan near an electrical socket to avoid running long extension cords across the room.
Identifying Your Wall Type
Understanding your wall type is essential for how to mount a floor fan on the wall safely. HDB flats contain three main wall types, and each demands a different approach.
- Concrete walls form the structural frame of your building. You can drill into these walls using a masonry drill bit and concrete anchors. Concrete provides excellent holding power for heavy fans. Knock on a concrete wall—it produces a dead, heavy thud with no echo.
- Brick walls appear in older HDB estates. Drilling into brick requires a hammer drill with masonry bits, and you must take care not to crack the mortar joints. Use sleeve anchors rated for masonry work.
- Drywall partitions are common in newer flats. These hollow walls consist of plasterboard fixed to a hidden metal or wooden frame. Standard plastic wall plugs will not hold in drywall. You must locate the wooden or metal studs behind the wall using a stud finder and screw directly into those studs. Alternatively, use specialised toggle bolts that spread the load behind the plasterboard.
HDB Regulations You Must Follow
Before you drill any holes for how to mount a floor fan on the wall, understand the Housing and Development Board’s rules. The cornerstone of HDB’s drilling policy is clear: all fasteners (screws, nails, or bolts) must not exceed 6 mm in diameter and 40 mm in penetration depth for all types of flats. This rule prevents damage to concealed electrical wiring and plumbing.
For newer flats with Ferrolite partition walls, extra precautions apply. Drilling must avoid a 200 mm strip below ceilings and beams, and penetration into these walls should be limited to about 22 mm. Noisy work, including drilling, is restricted to weekdays between 9:00 am and 5:00 pm and is prohibited on Saturdays, Sundays, and public holidays. HDB prohibits drilling into structural elements such as reinforced concrete walls, columns, beams, and slabs.
Step-by-Step Installation Guide
Follow these steps for a secure and HDB-compliant installation:
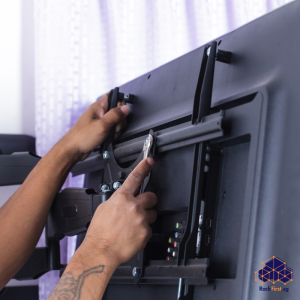
- Start by choosing the best location for your fan. Mark the desired position on the wall using a pencil, and hold the fan’s mounting bracket against the wall at the marked spot. Use a spirit level to ensure the bracket sits straight because an unbalanced bracket causes the fan to wobble during operation.
- Use a stud finder with AC detection to locate wall studs and identify any concealed electrical wiring or water pipes. In HDB flats, wiring typically runs vertically or horizontally from existing sockets and switches. Avoid drilling directly above, below, or beside any electrical point.
- Drill pilot holes at your marked positions, staying within HDB’s 6 mm diameter and 40 mm depth limits. For concrete walls, use a masonry drill bit. For drywall, locate the studs and drill directly into the wood or metal frame.
- Insert the appropriate wall anchors for your wall type. For concrete, use heavy-duty expansion anchors. For drywall studs, drive screws directly into the wood. For hollow drywall without studs, use toggle bolts that spread the load behind the wall.
- Attach the mounting bracket to the wall using the screws and tighten them firmly. Avoid over-tightening, which can damage the wall or strip the screws.
- Attach your fan to the bracket according to the manufacturer’s instructions. Secure all connections and verify that the fan sits level and stable. Test the fan at each speed setting to ensure it operates smoothly without excessive vibration.
Electrical Safety Considerations
Wall-mounted fans typically require hardwiring into your home’s electrical system via a fused connection unit or a dedicated switch. Hardwiring is safer, as it connects the fan directly to a circuit with the correct fuse protection. It also looks much cleaner, with no loose cables or plugs. Any electrical work associated with your installation requires engaging an Energy Market Authority licensed electrical worker. Improper wiring can void your home insurance and create a fire hazard.
Common Mistakes To Avoid
One frequent error involves using screws that are too long. Screws exceeding HDB’s 40 mm depth limit can penetrate concealed pipes or wiring, causing expensive damage.
Another mistake involves mounting the fan without locating wall studs first in drywall partitions. Screwing into hollow wall sections without proper anchors invites disaster because the weight and vibration of the fan can pull the mount from the wall.
Using undersized anchors ranks as another primary cause of installation failure. A fan’s vibration creates dynamic loads that far exceed its static weight. Always choose anchors rated for at least double your fan’s weight.
A third mistake involves ignoring the fan’s proximity to moisture-prone areas. Keep wall fans away from windows during rain and avoid mounting them in bathrooms unless specifically rated for moisture-resistant environments.
Professional Installation vs DIY
Learning how to mount a floor fan on the wall gives you the knowledge to attempt the job yourself. But the installation demands precision, the right tools, and knowledge of HDB regulations. Misaligned brackets lead to crooked, wobbly fans. Improper anchoring creates a safety hazard. Incorrect drilling violates HDB rules and risks expensive damage to concealed wiring and plumbing.
FixFirst’s handymen and licensed electricians bring years of experience installing wall-mounted fans across Singapore HDB flats. They identify your wall type correctly, select the right anchors for the job, and ensure every bracket sits level and secure. They handle all electrical connections safely and ensure compliance with HDB regulations. They also perform the drilling within HDB’s permitted hours, so you avoid noise complaints from your neighbours.
Final Thoughts
Learning how to mount a floor fan on the wall transforms your living space by freeing up floor area, improving air circulation, and eliminating tripping hazards. Before you mount, check your fan’s compatibility with wall mounting and choose the correct bracket. Identify your wall type and select appropriate anchors within HDB’s 6 mm diameter and 40 mm depth limits. Position the fan at the optimal height of 1.8 to 2 metres from the floor. And if you want the job done right the first time without the stress, leave it to the professionals.
Mount your floor fan safely and securely. Contact FixFirst today for expert wall fan installation services across Singapore. Our licensed electricians and handymen assess your wall, recommend the right bracket, handle the wiring, and ensure a stable, wobble-free result that complies with all HDB regulations.