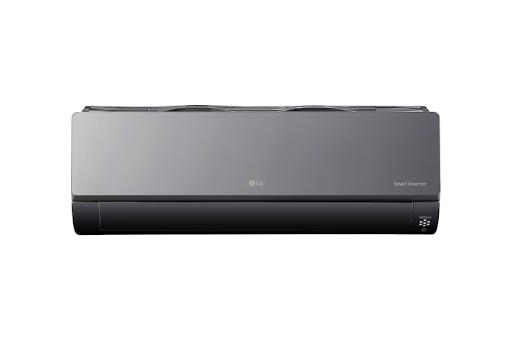
Choosing and installing a wall-mounted air conditioner in an HDB flat involves more than picking a model and mounting it on the wall. For homeowners considering an LG wall mounted AC unit, understanding the integration of product excellence, strict regulatory compliance, and professional installation is critical. These systems, known for their quiet operation and energy efficiency, demand precise installation to perform as promised. This guide explores every facet of owning an LG wall mounted ductless air conditioner in Singapore, from navigating HDB’s specific installation mandates to ensuring your unit delivers optimal cooling for years.
Before purchasing any air conditioning system, familiarizing yourself with the Housing & Development Board’s (HDB) regulations is the essential first step. These rules exist to ensure structural safety, public security, and harmonious living within HDB estates. Non-compliance can result in fines, mandatory removal of the unit, or even legal liabilities should an accident occur.
The HDB mandates that all air-conditioner installations, including your new LG wall mounted AC unit, must be performed by installers trained and registered with the Building and Construction Authority (BCA). This requirement is non-negotiable and ensures the technician possesses the necessary skills for safe, high-standard work. Furthermore, while many newer flats with 40-amp electrical loading do not require a prior permit, you must submit a post-installation report to your managing HDB Branch within 14 days. This report formalizes the installation and places it on record.
Key technical requirements directly impact your installation plan. All refrigerant and drainage piping must be run internally within your flat; no external trunking is permitted on the building facade. The condensation water must be properly channeled into a designated floor trap to prevent unsightly and damaging water stains on the exterior walls, for which you are financially responsible. The condensing unit (the outdoor compressor) must sit securely on the designated ledge with proper rubber padding to minimize vibration and noise. Crucially, installers cannot hack through reinforced concrete beams or columns. They typically drill a small, approved opening through the pre-cast facade for the pipes, carefully checking for and addressing any tile delamination around the opening point.
Selecting the right LG model involves matching the unit’s cooling capacity, measured in British Thermal Units (BTU), to your room’s size, orientation, and heat load. An undersized unit will strain to cool the space, leading to higher energy consumption and premature wear. An oversized unit will cycle on and off too frequently, causing uncomfortable temperature swings and failing to dehumidify the room adequately. For typical HDB bedrooms (10-16 sqm), a 9,000 BTU model is often suitable, while larger master bedrooms or living rooms may require 12,000 BTU or more.
Positioning the indoor unit is a critical decision that affects cooling performance, air distribution, and energy use. The ideal location is on a high wall, allowing cool air to descend and circulate evenly throughout the room. You must avoid placing the unit directly above large furniture like wardrobes or tall beds, as this obstructs airflow. Ensure there is at least 15 cm of clearance from the ceiling and walls on all sides for unimpeded air intake and exhaust.
Consider the path to the outdoor condensing unit. The shorter and straighter the refrigerant piping route, the more efficiently the system operates. The indoor unit should be positioned as close as possible to the external wall where the condensing unit will reside, minimizing the length of pipes needing to be concealed within false ceilings or trunking. Furthermore, avoid mounting the unit directly opposite a bed or sofa where the direct blast of cold air might cause discomfort. A position that allows airflow along the length of the room rather than directly across a seating area often provides more consistent comfort.
A professional installation by a BCA-trained technician is a complex, multi-stage process. It begins with a thorough site survey to verify electrical capacity, plan the piping route, and confirm the approved mounting locations for both indoor and outdoor units. The technician will check your HDB block’s electrical loading and ensure the total current of all your air-conditioners does not exceed the approved rating.
| Step | Details |
|---|---|
| Step 1: Mounting the Indoor Bracket | The technician securely mounts the heavy-duty bracket for the indoor unit on an interior wall, using a spirit level to ensure it is perfectly horizontal. This step is foundational, as an uneven bracket can cause operational noise and improper drainage. |
| Step 2: Drilling the Service Hole | A core drill creates a precise opening through the external wall for the refrigerant pipes, drainage hose, and electrical cables. The technician will inspect the surrounding tiles for stability and handle any delamination, as required by HDB guidelines. |
| Step 3: Installing the Outdoor Condensing Unit | The outdoor unit is placed on the designated HDB ledge with substantial rubber anti-vibration pads. It must be leveled and secured to prevent movement or excessive vibration, which can cause noise and structural concerns. |
| Step 4: Connecting Piping and Electricals | The copper refrigerant pipes are carefully uncoiled, cut to length, flared, and connected between the two units in a vacuum-tight manner. The condensate drain hose is routed with a consistent downward slope toward the internal floor trap. All electrical connections are made according to Singapore safety standards. |
| Step 5: Vacuuming and Testing | This is the most critical technical step. The system is connected to a vacuum pump to remove all moisture and air from the refrigerant lines, a process that typically takes 20–30 minutes. The technician then releases the refrigerant from the outdoor unit into the lines and performs comprehensive tests for cooling performance, drainage flow, and any gas leaks. |
| Step 6: Final Checks and Clean-up | The technician seals the wall opening, tidies the piping, and conducts a final operational check. They will also brief you on basic operation and maintenance before cleaning the work area. |
Need a Daikin aircon installed in your HDB flat? FixFirst’s certified technicians deliver expert, rule-compliant installations—from secure mounting to perfect vacuum sealing. We ensure quiet, efficient, and long-lasting performance. Let us handle the job right the first time.
| Consideration | Key Details & Requirements |
|---|---|
| HDB Regulations | BCA-trained installer mandatory; internal piping only; post-installation report to HDB; outdoor unit on designated ledge only. |
| Professional Installation | Requires precision leveling, vacuum-tight piping, proper vacuuming of lines, and electrical load verification. |
| Optimal Positioning | High on wall, away from obstructions, with clear airflow path, close to external wall for outdoor unit. |
| Routine Maintenance | Filter cleaning every 2–4 weeks; professional chemical servicing at least annually. |
| Understanding Error Codes | Codes like CH/CS (communication), F/E (sensor), etc., detailed in the user manual. |
Even the most reliable LG wall mounted ductless air conditioner can display error codes. These codes are your system’s diagnostic language, communicating specific aircon unit issues that need attention. Prompt and correct interpretation prevents minor faults from escalating into costly repairs or system failures. Your primary reference should always be the official LG wall mounted air conditioner manual for your specific model, as codes can vary slightly between series.
Common LG Error Codes and Their Meanings
CH/CH05, CS/CS05 (Communication Error): This frequent code signals a breakdown in communication between the indoor and outdoor units. Causes range from faulty wiring connections, electrical interference from other appliances, a tripped circuit breaker, or a malfunctioning main PCB in either unit.
F/F1, E/E1 (Indoor Coil Temperature Sensor Error): The sensor measuring the temperature of the indoor evaporator coil has failed or is providing an implausible reading. This prevents the system from regulating cooling cycles properly, leading to inefficient operation or a complete shutdown.
F/F2, E/E2 (Indoor Air Temperature Sensor Error): Similar to the coil sensor, this pertains to the sensor that monitors the room’s ambient air temperature. A fault here means the unit cannot accurately gauge the room’s condition to adjust its output.
F/F3, E/E3 (Outdoor Coil/Discharge Pipe Sensor Error): This indicates a problem with a sensor on the outdoor condenser coil or refrigerant discharge line. It affects pressure and temperature management, crucial for system efficiency and compressor health.
High/Low Pressure Faults (often displayed as specific numeric codes): These serious codes indicate refrigerant pressure outside safe operating limits. Low pressure often points to a refrigerant leak, while high pressure can be caused by a dirty outdoor condenser coil, a faulty fan, or a refrigerant overcharge.
Full List of LG Aircon Error Codes and Their Meanings
You can download the complete LG aircon fault code listing, or you can refer to the list below:
For Indoor Unit Fault Code Displays
Typically applies to LS091HSV System (LSN091HSV Indoor Units / LSU091HSV Outdoor Units) and LS121HSV System (LSN121HSV Indoor Units / LSU121HSV Outdoor Units)
| Code | Description |
|---|---|
| 1 | Indoor unit return air thermistor has disconnected or has shorted out. |
| 2 | Indoor unit inlet pipe thermistor has disconnected or has shorted out. |
| 5 | Communication failure from indoor unit to outdoor unit. |
| 6 | Indoor unit outlet pipe thermistor has disconnected or has shorted out. |
| 9 | Indoor unit EEPROM error. |
| 10 | Indoor unit fan has locked up (fan motor operation failure). |
| 12 | Indoor unit middle pipe thermistor has disconnected or has shorted out. |
| 21 | DC peak error / IPM fault; compressor DC voltage was too high. |
| 22 | Current transformer 2 (CT2) error; AC input current is too high. |
| 23 | DC link voltage is too low. |
| 25 | Voltage to the system is too low or too high. |
| 26 | Inverter compressor has seized up or is not providing rotation. |
| 27 | Prospective short circuit (PSC) fault error; current to inverter compressor between AC and DC converter circuit is too high. |
| 28 | Inverter compressor DC voltage is too high. |
| 29 | Inverter compressor amperage is too high. |
| 31 | Current to the current transformer (CT) thermistor is too low. |
| 32 | Inverter compressor discharge pipe temperature is too high. |
| 40 | Current transformer (CT) thermistor has disconnected or has shorted out. |
| 41 | Inverter compressor discharge pipe thermistor has disconnected or has shorted out. |
| 44 | Outdoor unit inlet air thermistor has disconnected or has shorted out. |
| 45 | Outdoor unit condenser coil middle thermistor has disconnected or has shorted out. |
| 46 | Outdoor unit suction line thermistor has disconnected or has shorted out. |
| 48 | Outdoor unit coil outlet (liquid line) thermistor has disconnected or has shorted out. |
| 53 | Communication failure from outdoor unit to indoor unit. |
| 60 | Outdoor unit PCB EEPROM check sum error. |
| 61 | Outdoor unit condenser coil temperature is too high. |
| 62 | Outdoor unit inverter compressor PCB heat sink temperature is too high. |
| 63 | Condenser coil pipe thermistor temperature is too low. |
| 65 | Heat sink thermistor has disconnected or has shorted out. |
| 67 | Outdoor BLDC fan motor lock error. |
For Outdoor Unit Fault Code Displays
Typically applies to LS091HSV System (LSN091HSV Indoor Units / LSU091HSV Outdoor Units)
LS121HSV System (LSN121HSV Indoor Units / LSU121HSV Outdoor Units)
| Code | Description |
|---|---|
| 21 | DC peak error / IPM fault; compressor DC voltage was too high. |
| 22 | Current transformer2 (CT2) error; AC input current is too high. |
| 23 | DC link voltage is too low. |
| 25 | Voltage to the system is too low or too high. |
| 26 | Inverter compressor has seized up or is not providing rotation. |
| 27 | Prospective short circuit (PSC) fault error; current to inverter compressor between AC and DC converter circuit is too high. |
| 28 | Inverter compressor DC voltage is too high. |
| 29 | Inverter compressor amperage is too high. |
| 31 | Current to the current transformer (CT) thermistor is too low. |
| 32 | Inverter compressor discharge pipe temperature is too high. |
| 40 | Current transformer (CT) thermistor has disconnected or has shorted out. |
| 41 | Inverter compressor discharge pipe thermistor has disconnected or has shorted out. |
| 44 | Outdoor unit inlet air thermistor has disconnected or has shorted out. |
| 45 | Outdoor unit condenser coil middle thermistor has disconnected or has shorted out. |
| 46 | Outdoor unit suction line thermistor has disconnected or has shorted out. |
| 48 | Outdoor unit coil outlet (liquid line) thermistor has disconnected or has shorted out. |
| 53 | Communication failure from outdoor unit to indoor unit. |
| 60 | Outdoor unit PCB EEPROM check sum error. |
| 61 | Outdoor unit condenser coil temperature is too high. |
| 62 | Outdoor unit inverter compressor PCB heat sink temperature is too high. |
| 63 | Condenser coil pipe thermistor temperature is too low. |
| 65 | Heat sink thermistor has disconnected or has shorted out. |
| 67 | Outdoor BLDC fan motor lock error. |
Proactive Troubleshooting Steps:
For codes like CH/CS, begin with simple checks: ensure the outdoor unit’s power isolator switch is on, verify the indoor circuit breaker hasn’t tripped, and replace the remote control batteries. For sensor errors (F/E codes), a professional technician with the right tools is almost always required for accurate diagnosis and replacement. Pressure-related faults demand immediate professional attention because attempting to handle refrigerant without a license is illegal and dangerous in Singapore.
When To Call a Professional:
If an error code persists after basic electrical checks, or if you encounter codes related to refrigerant pressure, fan motors, or compressor issues, contact a certified technician immediately. A FixFirst technician can accurately diagnose the fault using specialized gauges and meters, ensuring a safe and lasting repair that restores your LG wall mounted air conditioner manual-specified performance.
Regular maintenance is the single most effective way to protect your investment, maintain low energy bills, and prevent unpleasant breakdowns. The cornerstone of this routine is cleaning the indoor unit’s air filters every two weeks in high-usage periods. Simply remove the filters, rinse them under running water, and let them dry completely before reinstalling. This simple act maintains airflow and cooling efficiency while improving indoor air quality.
A comprehensive professional servicing at least once a year is highly recommended. During this service, a technician will perform deep cleaning of the indoor evaporator coil and blower fan, which you cannot safely access yourself. They will also clean the outdoor condenser coil, check refrigerant pressure, tighten electrical connections, and ensure the drainage system is completely clear. This proactive care prevents minor issues from escalating into major repairs, ensures your system runs efficiently to combat Singapore’s heat, and extends the lifespan of your LG wall mounted AC unit.
✔️BCA-Certified Expertise: Every FixFirst aircon installer is BCA-trained and registered, guaranteeing full compliance with HDB’s stringent safety and technical standards from the first drill hole to the final test.
✔️Precision Installation for Peak Performance: We treat every installation as a custom project, ensuring perfect leveling, airtight piping connections, and a thorough vacuum process. This precision directly translates to the energy efficiency, cooling power, and quiet operation promised by your LG wall mounted ductless air conditioner.
✔️Comprehensive Service and Accountability: Our service doesn’t end when the unit turns on. We can help manage the required HDB installation report submission and provide clear maintenance advice.
✔️Integrated Home Service Knowledge: As specialists in electrical, plumbing, and handyman services, we possess a unique understanding of your home’s systems. This allows us to anticipate and navigate complex routing challenges, ensure proper electrical loading, and achieve a tidy, integrated finish that purely aircon contractors might overlook.

For a standard 4-room HDB bedroom (approximately 10-14 square meters), a 9,000 BTU model is generally adequate. For larger master bedrooms (up to 20 square meters) or rooms with significant afternoon sun exposure, consider a 12,000 BTU unit. A professional from FixFirst can perform a precise load calculation during a site survey to recommend the perfect capacity.
If your HDB block was completed after 1st January 1994 or has undergone the Main Upgrading Programme (MUP), it likely has a 40-amp electrical loading and does not require a pre-installation permit. However, you must submit an installation report to HDB within 14 days after the work is complete. Flats with older 30-amp loading have different requirements, which our technicians can help you verify.
We recommend a basic filter clean by yourself every two to four weeks. A full professional chemical wash and servicing should be scheduled at least once a year, ideally before the peak of the hot season, to ensure optimal performance and hygiene.
No. The outdoor condensing unit must be placed on the designated air-conditioner ledge provided by HDB. It cannot be installed on the common corridor, within your balcony if it obstructs space, or fixed directly to the balcony railing for safety and regulatory reasons.
The most frequent cause is a clogged condensate drain line. Over time, algae and dust can block the thin drain hose, causing condensation to back up and leak from the indoor unit. This is a common issue resolved during a professional servicing.
The physical manual is provided in the unit’s packaging. A digital PDF version for your specific model number can always be found on the official LG Singapore website’s support section. Keeping this manual is crucial for understanding error codes and basic troubleshooting.
Investing in an LG wall-mounted air conditioner for your HDB flat is a decision that enhances daily living comfort in our tropical climate. However, the unit’s quality is only one part of the equation. Its long-term reliability, efficiency, and compliance hinge entirely on expert installation and consistent care. By partnering with a certified professional service like FixFirst, you gain the assurance of safety, the optimization of performance, and a dedicated resource for the lifespan of your system.
Experience the perfect blend of LG innovation and expert installation. Contact FixFirst today over Whatsapp for a consultation and a quotation. Let our certified technicians ensure your new air conditioner is a source of cool comfort for years to come.