Daikin wall mounted air conditioners are a premier choice for climate control in Singapore homes, offering a blend of quiet efficiency and smart features well-suited to HDB living. The journey from selecting the right model to enjoying its cool comfort hinges on one critical factor: correct installation and consistent maintenance. An air conditioning system expertly installed not only performs better and lasts longer but also adheres strictly to Singapore’s Housing & Development Board (HDB) regulations, safeguarding your home and investment. This guide provides HDB owners with a thorough understanding of everything from selecting a Daikin wall mounted aircon to its professional setup, daily operation, and troubleshooting.
Whether you are reviewing the latest Daikin wall mounted catalogue for a new bedroom unit or managing an existing system, knowledge of proper practices ensures optimal performance. We will explore the technical specifics, such as the Daikin 3.5kw wall mounted dimension, and the practical steps for care and repair. For residents also considering alternatives, understanding the Daikin wall mount and ceiling cassette price difference can inform a better decision. By aligning your approach with both manufacturer guidelines and local requirements, you can achieve a reliable, efficient, and durable cooling solution for your home.
What’s in this guide:
- Navigating HDB Regulations for Aircon Installation
- A Step-by-Step Guide to Installing Your Daikin Wall Mounted Unit
- Best Practices for Positioning Your Daikin Indoor and Outdoor Units
- Essential Maintenance for Peak Performance and Longevity
- Understanding and Troubleshooting Daikin Error Codes
- Why Choose a FixFirst Technician To Install Your Wall-Mounted Daikin Aircon
- Frequently Asked Questions (FAQs)
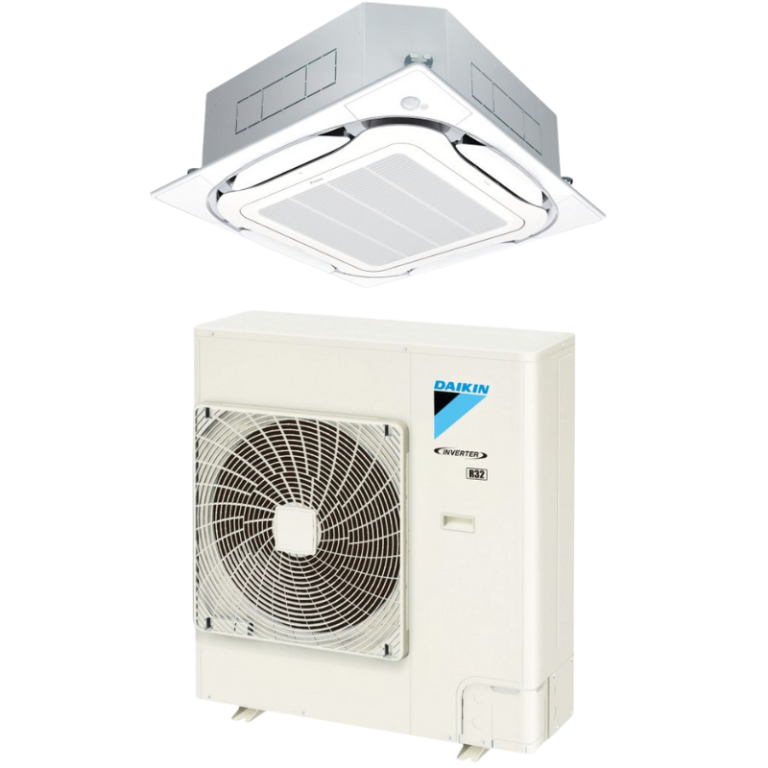
Before any installation begins, understanding and complying with HDB’s framework is non-negotiable for any renovation or addition in your flat. The HDB places the responsibility for proper and safe installation squarely on the homeowner. This means the choices you make in selecting equipment and technicians carry significant weight.
A primary consideration is your block’s electrical loading capacity. HDB blocks completed on or after 1 January 1994, or those that have undergone the Main Upgrading Programme (MIP) or Home Improvement Programme (HIP), are typically equipped with a higher electrical loading of 40amps. If your block falls into this category, you generally do not need to apply for a separate permit from HDB to install an air-conditioner. However, verifying your block’s specific electrical loading is a crucial first step.
Furthermore, HDB mandates that all installers engaged for the work must be trained and accredited by the Building and Construction Authority (BCA). This requirement is in place to ensure that installers possess the necessary skills to perform installations that are structurally sound, electrically safe, and compliant with all approved methods and locations. An installation that disregards these rules not only risks fines but can also pose serious safety hazards to your household and neighbours.
Professional installation of a Daikin single split wall mounted system is a detailed process that goes far beyond simply mounting a unit on the wall. A proper installation ensures efficiency, longevity, and quiet operation. Here is a breakdown of the critical steps a certified technician will follow:
| Step | Details |
|---|---|
| Step 1: Site Survey and Planning | The technician first assesses the room size, layout, and sunlight exposure to confirm the suitable capacity (e.g., a Daikin 3.5kw wall mounted unit for a standard master bedroom). They identify the optimal indoor unit location for even air distribution, away from direct sunlight or heat sources, and plan the routing for copper pipes and drainage to the outdoor condenser location, strictly adhering to HDB-approved spots. |
| Step 2: Mounting the Indoor Unit Bracket | Using a precise level, the technician marks and securely installs the Daikin wall mount bracket. The strength of the wall is verified to support the unit’s weight, which can be checked in the Daikin indoor wall mounted air con size and weight specifications. |
| Step 3: Installing the Outdoor Condenser Unit | The condenser is placed on a sturdy, level base at the approved HDB ledge or balcony. Proper spacing around the unit is maintained for unimpeded airflow and ease of future maintenance access. |
| Step 4: Running Connections and Piping | Refrigerant copper pipes are carefully cut, deburred, and connected. They are then insulated meticulously to prevent energy loss and condensation drip. A separate drain pipe is installed with a consistent downward slope to ensure condensate water flows away smoothly and without blockage. |
| Step 5: Electrical Wiring and Vacuuming | A dedicated electrical circuit from your main board is connected to the outdoor unit. The most critical step is then performed: a deep vacuum is drawn on the refrigerant lines to remove all moisture and air. This process is essential for protecting the compressor and ensuring the system runs at its advertised efficiency. |
| Step 6: Leak Testing, Charging, and Commissioning | The system is pressure-tested to check for leaks before the correct amount of refrigerant is charged. The technician then powers on the system, tests all functions of the Daikin wall mounted aircon controller, measures temperature differentials, and verifies quiet operation before handing it over. |
Need a new Daikin aircon installed in your HDB flat? FixFirst ensures full compliance, precision workmanship, and warranty-safe installation. From accurate sizing to deep vacuum sealing, we guarantee a cool, quiet, and reliable setup—done right the first time.
Strategic positioning of both the indoor and outdoor components dramatically affects your aircon’s effectiveness and energy consumption.
For the Daikin wall mounted air conditioner, the ideal indoor location is on a wall that allows for the widest possible airflow across the room, typically on a longer wall. Avoid placing it directly above heat-emitting electronics like televisions or lamps. Ensure the airflow path is not obstructed by furniture, curtains, or interior decor. The unit should be mounted at a recommended height, usually between 2.1 to 2.3 meters from the floor, to facilitate effective air circulation. The goal is to allow the cooled air to mix thoroughly with the room air for consistent comfort.
The outdoor condenser unit requires a location with abundant, uninterrupted airflow. HDB-approved ledges are designed for this purpose. The unit must be placed on a stable, level platform and should have ample clearance on all sides, especially the fan grill side, as specified in the Daikin 12000 BTU wall mounted split specs. This prevents overheating, which forces the compressor to work harder, increasing energy bills and wear. The area should also allow for safe and easy access for cleaning and servicing.
Regular maintenance is the most effective strategy to preserve the cooling power, efficiency, and lifespan of your Daikin wall mounted split unit. A neglected system must strain to produce cold air, leading to higher electricity costs and a greater likelihood of breakdowns.
A comprehensive professional servicing, recommended every 6 to 12 months, includes several key tasks. Technicians will clean the indoor unit’s filters, coils, and drainage tray to prevent airflow blockage, ice formation, and algae growth that causes water leaks. They will also clean the outdoor condenser coils, which accumulate dust and grime that act as insulation, causing the system to overheat. The technician will check refrigerant levels, inspect electrical connections, and clear the drain line to ensure everything operates as intended.
Homeowners can support this professional care with simple, regular upkeep. Gently washing the reusable indoor air filter with water every two weeks is the single most important habit. This simple act maintains good airflow and indoor air quality. Additionally, keeping the area around both the indoor and outdoor units free from clutter and obstructions allows the system to breathe and function efficiently.
When your Daikin wall mounted aircon encounters an issue, it often communicates through a series of error codes displayed on the Daikin wall mounted aircon controller. These codes are vital diagnostic tools. While some minor issues can be resolved with basic troubleshooting, persistent codes typically signal the need for professional attention from a trained technician.
| Error Code | Likely Meaning & Potential Causes | Initial Troubleshooting Steps |
|---|---|---|
| A3 | Indoor/Outdoor Unit Communication Error. Loose wiring or PCB fault. | Check if the outdoor unit power is on. Turn the system off at the main switch for 5 minutes, then restart. If code persists, call a technician. |
| E0 / E1 | Safety Device Activation or Indoor Fan Motor Error. Dirty filters, blocked fan, or motor circuit issue. | Turn off the unit. Clean the indoor air filter thoroughly. Ensure no obstructions are around the indoor fan. Restart. |
| E5 / E6 | Reverse Valve or Overcurrent Protection Error. Possible issue with the cooling/heating changeover valve or electrical fault. | Switch the system off via the remote and main power. Wait 15 minutes and restart. If error returns immediately, professional repair is needed. |
| F3 / H3 | High Pressure Protection Switch Error. Outdoor coil is dirty, outdoor fan is faulty, or refrigerant is overcharged. | Check if the outdoor unit is excessively dirty or has blocked airflow. Clear any debris around it. Do not attempt to handle refrigerant. |
| P1 / P2 | Fan Position Sensor or DC Fan Motor Error on Indoor Unit. | Power cycle the unit. If the code remains, the indoor unit PCB or fan motor likely requires professional inspection. |
| U0 / U2 | Low Refrigerant Pressure or Overcurrent Error. Possible refrigerant leak or compressor electrical fault. | Immediately turn off the system. These codes can indicate serious issues. Contact a certified technician for leak detection and repair. |
| UA | Indoor/Outdoor Unit Capacity Code Mismatch. | This usually points to an incorrect configuration during installation. A technician must verify and correct the unit pairing and settings. |
📌Important Note: This table provides a general guide for common Daikin codes. Always refer to your specific model’s official manual for the most accurate information. For safety and to prevent further damage, especially for codes related to refrigerant (like U0) or high pressure (like F3), engage a qualified professional from a trusted service like FixFirst.
Selecting the right technician is as crucial as selecting the right air conditioner. A professional installation by FixFirst lays the foundation for years of reliable, efficient, and trouble-free cooling. Our technicians bring a combination of certification, experience, and a commitment to quality that directly protects your investment.
✔️BCA-Certified Expertise: Every FixFirst installer is trained and accredited by the Building and Construction Authority, ensuring full compliance with all HDB safety and structural guidelines. We handle permit checks and approved installation methods so you don’t have to worry.
✔️Precision Installation for Peak Efficiency: We follow a meticulous, manufacturer-recommended process. Our strict adherence to procedures like proper vacuuming and refrigerant charging ensures your Daikin unit delivers the exact energy efficiency promised in its specifications, saving you money on monthly bills.
✔️Structural Integrity and Leak Prevention: We use high-grade materials and secure all fittings to the highest standard. Our focus on a perfectly sloped drainage path and thoroughly insulated pipes prevents future problems like water leakage and condensation issues that can damage your home interiors.
✔️Warranty Safeguard and Future-Proof Service: A professional installation is often required to keep your Daikin manufacturer’s warranty valid. Furthermore, as your long-term service partner, we maintain a detailed record of your system, enabling faster, more informed support for any future maintenance or repair needs.

Room size is the primary factor. A general guideline is to allocate about 500-600 BTU per square meter. For a standard 4m x 4m (16 sqm) HDB bedroom, a 9000 BTU (approx. 2.6kW) unit is often sufficient. For larger master bedrooms or living rooms, a 12000 BTU or 18000 BTU unit may be needed. You can find precise recommendations in the Daikin wall mounted inverter catalogue or consult with a FixFirst technician for a tailored site survey.
A Daikin single split wall mounted system consists of one outdoor unit connected to one indoor unit. A multi-split system connects one outdoor unit to multiple indoor units (e.g., two or three bedrooms). Multi-split systems save outdoor space but require careful sizing so the outdoor unit has enough capacity to run all indoor units simultaneously.
No. You must install it at HDB-approved locations, which are typically the reinforced concrete ledges or designated areas on your balcony. Installation on lightweight walls, windows, or unauthorized ledges is prohibited for safety reasons. A professional installer will know and adhere to these regulations.
For typical usage in Singapore’s climate, a professional chemical wash or overhaul is recommended annually. If the system is used heavily or daily, consider servicing every 6 months. Regular monthly cleaning of the indoor filter by the homeowner is also essential.
This is commonly caused by a clogged drain pipe due to algae or dust buildup. It can also occur if the drainage pipe was not installed with a proper slope. Turn off the unit to prevent water damage and contact a technician to clear the drain line and check the installation.
Absolutely. Inverter technology, as featured in models from the Daikin wall mounted inverter catalogue, allows the compressor to adjust its speed rather than constantly turning on and off. This leads to significant energy savings (up to 30-40%), quieter operation, and more stable room temperatures, making it highly cost-effective over the system’s lifespan.
First, note the exact code and refer to your user manual. For simple codes like E1 (filter warning), you can try cleaning the filter and restarting. For persistent codes or complex ones related to refrigerant (U0, U2) or pressure (F3), turn the system off and contact a professional technician immediately to avoid further damage.
A Daikin wall mounted air conditioner is a significant investment in your home’s comfort and liveability. Its true value, however, is unlocked not just at the point of purchase but through the precision of its installation and the consistency of its care. From understanding the Daikin 12000 BTU wall mounted split specs Singapore market offers to ensuring your air conditioning unit is positioned and maintained for Singapore’s unique climate, every detail contributes to a cooler home and lower worries.
Don’t leave the performance and longevity of your cooling system to chance. Contact FixFirst today for a professional consultation, transparent quotation, and BCA-certified installation of your Daikin system. Let our expertise transform your HDB into a haven of reliable, efficient comfort.